
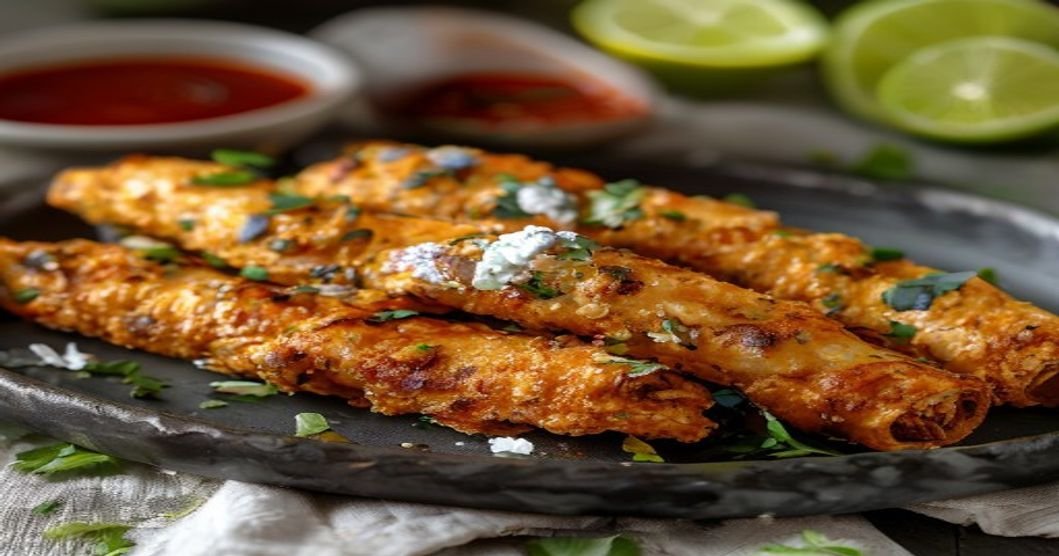
Crispy Baked Buffalo Chickpea Taquitos: A Plant-Based Crunch You’ll Crave
Let’s be real—sometimes you just need a snack that’s crunchy, spicy, and satisfying, without the guilt (or the grease). Enter: Crispy Baked Buffalo Chickpea Taquitos. These little rolls of joy are packed with protein, bold flavors, and that addictive Buffalo kick we all love. Plus, they’re baked, not fried, so you can enjoy them without the post-snack regret.
Whether you’re meal prepping, hosting game day, or just treating yourself, these taquitos are a game-changer. They’re easy to make, customizable, and—best of all—delicious. Ready to dive in? Let’s roll!
—
Why You’ll Love These Taquitos
Before we get to the recipe, let’s talk about why these taquitos are a must-try:
- Plant-Based & Protein-Packed: Chickpeas are the star here, giving you a hearty dose of fiber and plant-based protein.
- Baked, Not Fried: No deep frying means less mess and fewer calories—just pure, crispy goodness.
- Customizable: Swap the buffalo sauce for BBQ, ranch, or even a sweet glaze. The possibilities are endless!
- Meal-Prep Friendly: Make a batch, freeze them, and bake whenever you’re ready. Perfect for quick snacks or sides.
- Kid-Approved: If you’ve got picky eaters, try a milder buffalo sauce or serve with a side of ranch for dipping.
Now, let’s get cooking!
—
Ingredients You’ll Need
Here’s what you’ll need to whip up a batch of these crispy taquitos. (Makes about 24 taquitos.)
- For the Filling:
- 1 can (15 oz) chickpeas, drained and rinsed
- 1 tbsp olive oil
- 1 small onion, finely diced
- 2 cloves garlic, minced
- 1 tsp ground cumin
- 1 tsp smoked paprika
- ½ tsp salt
- ½ tsp black pepper
- 1 cup shredded cheddar cheese (or vegan cheese for a dairy-free option)
- ½ cup buffalo sauce (store-bought or homemade)
- For Assembly:
- 12-15 small flour tortillas (or corn tortillas for gluten-free)
- Cooking spray (or a light brush of oil)
Pro Tip: If you love extra heat, add a dash of cayenne pepper or hot sauce to the filling. For a milder version, reduce the buffalo sauce and mix in some ranch or blue cheese dressing.
—
Step-by-Step Instructions
1. Prep the Chickpeas
Start by mashing the chickpeas. You can do this with a fork, a potato masher, or even your hands (if you’re feeling adventurous). You want them mostly mashed but with a few small chunks for texture. Set aside.
2. Sauté the Aromatics
Heat the olive oil in a skillet over medium heat. Add the diced onion and sauté for 3-4 minutes until softened. Stir in the garlic, cumin, smoked paprika, salt, and pepper, and cook for another 30 seconds until fragrant.
3. Mix the Filling
Remove the skillet from heat and stir in the mashed chickpeas. Let the mixture cool slightly, then mix in the shredded cheese and buffalo sauce. Taste and adjust the seasoning if needed—add more salt, pepper, or hot sauce to suit your preference.
4. Assemble the Taquitos
Lay out a tortilla and spoon about 2 tablespoons of the chickpea mixture onto the center. Roll it up tightly, tucking in the sides as you go. Repeat with the remaining tortillas and filling.
Pro Assembly Tip: If your tortillas are cracking, warm them up for a few seconds in the microwave or a dry skillet to make them more pliable.
5. Prep for Baking
Preheat your oven to 400°F (200°C). Line a baking sheet with parchment paper or a silicone mat. Arrange the taquitos seam-side down on the sheet. Lightly spray or brush the tops with oil (this helps them crisp up!).
6. Bake to Perfection
Bake for 20-25 minutes, flipping halfway through, until the taquitos are golden brown and crispy. If you like them extra crispy, broil for 1-2 minutes at the end (keep an eye on them! They burn quickly.).
7. Serve and Enjoy!
Let the taquitos cool for a few minutes before serving. They’re delicious on their own, but even better with dips like ranch, blue cheese, or extra buffalo sauce.
—
Game-Changing Tips for the Best Taquitos
Want to take your taquitos to the next level? Try these tips:
- Double Up the Cheese: For extra gooeyness, sprinkle a little cheese on top of the taquitos before baking.
- Freeze for Later: Assemble the taquitos, place them on a tray, and freeze until solid. Then transfer to a freezer bag. Bake from frozen, adding 5-10 extra minutes to the cooking time.
- Air Fryer Option: Cook at 375°F (190°C) for 8-10 minutes, shaking halfway. This gives an even crispier texture!
- Swap the Tortillas: Use low-carb tortillas for a lighter version or whole wheat for extra fiber.
- Add Veggies: Finely chop spinach, bell peppers, or zucchini and mix them into the filling for extra nutrients.
—
Buffalo Sauce Variations to Try
The classic buffalo sauce is amazing, but why stop there? Here are a few fun twists:
- Spicy Buffalo: Use your favorite hot sauce + melted butter (or vegan butter) for extra heat.
- Honey Buffalo: Mix buffalo sauce with a drizzle of honey or maple syrup for a sweet and spicy kick.
- Smoky Buffalo: Add a dash of liquid smoke or chipotle powder to the sauce for a deeper flavor.
- Ranch or Blue Cheese Buffalo: Stir in a spoonful of ranch or blue cheese dressing for a creamy twist.
—
Serving Suggestions & Pairings
These taquitos are versatile, so here are some fun ways to serve them:
- Game Day: Serve with classic sides like celery sticks, carrot sticks, and blue cheese dressing for dipping.
- Taco Tuesday: Crumble them over a salad or nachos for a fun twist on taco night.
- Lunchbox: Pack them in a thermos or bento box with a side of salsa or guacamole for a satisfying lunch.
- Party Platter: Arrange them alongside other appetizers like spinach-artichoke dip or stuffed jalapeños for a crowd-pleasing spread.
Pro Tip: If you’re serving these to a crowd, set out small bowls of different dips so everyone can customize their plate!
—
Frequently Asked Questions
Can I make these taquitos gluten-free?
Absolutely! Use corn tortillas instead of flour tortillas, and ensure all your sauces and seasonings are gluten-free. Most buffalo sauces are naturally gluten-free, but always double-check the label.
How do I reheat leftover taquitos?
To keep them crispy, reheat in the oven at 350°F (175°C) for 10-15 minutes or in an air fryer for 3-5 minutes. Avoid the microwave—it’ll make them soggy!
Can I use dried chickpeas?
Yes! Soak and cook 1 cup of dried chickpeas until tender, then mash and use as directed. This works great if you’re meal prepping or want to save money.
What’s the best way to store leftovers?
Store baked taquitos in an airtight container in the fridge for up to 4 days. Freeze for up to 3 months. Reheat as mentioned above.
Can I make these ahead of time?
Definitely! Assemble the taquitos and freeze them on a tray before transferring to a freezer bag. Bake straight from frozen when ready to eat.
—
Why These Taquitos Are a Must-Try
Let’s recap why you should add these Crispy Baked Buffalo Chickpea Taquitos to your recipe rotation:
- They’re simple to make with minimal ingredients.
- They’re baked, not fried, so you can feel good about indulging.
- They’re packed with flavor and customizable to your taste.
- They’re perfect for meal prep and freezer-friendly.
- They’re a crowd-pleaser at parties or game day gatherings.
Whether you’re a seasoned plant-based eater or just looking for a healthier snack option, these taquitos deliver on all fronts. Plus, they’re just plain fun to eat!
—
Ready to Roll?
Now that you’ve got the recipe (and all the pro tips!), it’s time to get cooking. Grab your ingredients, preheat that oven, and let’s make some magic happen. Don’t forget to snap a pic and tag us on social media—we’d love to see your crispy creations!
Final CTA: What’s your favorite way to enjoy taquitos? Share your tips in the comments below or let us know if you try a fun twist on this recipe. Happy snacking!