
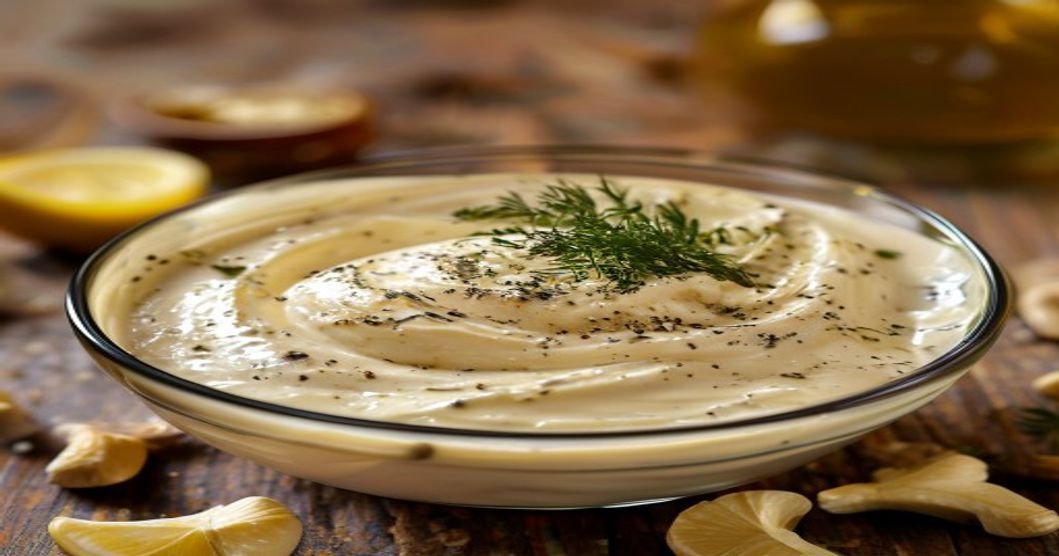
10-Minute Dairy-Free Sour Cream from Scratch: Easy & Delicious
Whether you’re vegan, lactose intolerant, or simply looking to reduce dairy in your diet, this 10-minute dairy-free sour cream is a game-changer. Made with just a few simple ingredients, this creamy, tangy alternative rivals traditional sour cream in both taste and texture. Best of all, it’s incredibly easy to make at home with no special equipment required.
In this guide, we’ll walk you through the step-by-step process, share expert tips for customization, and explain why this recipe is a must-try for anyone seeking a healthier, plant-based alternative. Let’s dive in!
Why Choose Dairy-Free Sour Cream?
Dairy-free sour cream isn’t just for those with dietary restrictions—it’s a versatile, healthier option for everyone. Here’s why you should consider making the switch:
- Lactose-Free: Ideal for people with lactose intolerance who experience digestive discomfort from dairy products.
- Vegan-Friendly: Perfect for plant-based diets, ensuring no animal products are used.
- Lower in Saturated Fat: Traditional sour cream is high in saturated fats, while dairy-free versions often use healthier fats like coconut or cashews.
- Allergen-Friendly: Free from common allergens like dairy, making it suitable for those with food sensitivities.
- Customizable: You can adjust the flavor, thickness, and ingredients to suit your preferences.
Ingredients You’ll Need
This recipe requires just 5 simple ingredients, most of which you may already have in your pantry. Here’s what you’ll need:
- 1 cup raw cashews (soaked) – The base of this recipe, providing a creamy texture.
- ½ cup water (or unsweetened almond milk for extra creaminess) – Helps blend the cashews smoothly.
- 2 tablespoons lemon juice (or apple cider vinegar) – Adds the signature tangy flavor.
- 1 tablespoon nutritional yeast (optional) – Enhances the cheesy, umami taste.
- ½ teaspoon salt – Balances the flavors.
Note: If you don’t have cashews, you can substitute them with silken tofu or coconut cream for a different texture. However, cashews yield the creamiest results.
Step-by-Step Instructions
1. Soak the Cashews (Quick Method)
For the creamiest texture, soak the cashews in hot water for 10 minutes. If you’re short on time, boiling water works too—just let them sit until softened. Drain and rinse before blending.
2. Blend the Ingredients
Add the soaked cashews, water (or almond milk), lemon juice, nutritional yeast, and salt to a high-speed blender. Blend until completely smooth, scraping down the sides as needed. This should take about 1-2 minutes.
3. Adjust the Consistency
If the mixture is too thick, add 1-2 tablespoons of water and blend again. For a thicker sour cream (like for dips), reduce the liquid slightly.
4. Taste and Season
Give it a taste! If you prefer a tangier flavor, add more lemon juice. For extra richness, a pinch of garlic powder or onion powder works wonders.
5. Store Properly
Transfer the dairy-free sour cream to an airtight container and refrigerate for at least 30 minutes to thicken. It will keep for 5-7 days in the fridge.
Creative Ways to Use Dairy-Free Sour Cream
This versatile condiment can be used in countless ways. Here are some delicious ideas:
- Topping for Tacos & Nachos: A dollop adds creaminess to Mexican dishes.
- Baked Potatoes: Mix with chives for a classic loaded potato topping.
- Dips & Dressings: Blend with herbs for a quick veggie dip or salad dressing.
- Soups & Chilis: Stir into creamy soups or chili for extra richness.
- Vegan Baking: Use in cakes, muffins, or frostings for moisture and tang.
- Sauces: Mix into pasta sauces or curries for a creamy finish.
Expert Tips for the Best Results
1. Soak Cashews Properly
For the smoothest texture, soak cashews in hot water for at least 10 minutes. If using a regular blender (not high-speed), soak them longer (up to 2 hours) for easier blending.
2. Use a High-Speed Blender
A Vitamix or Ninja blender works best for achieving a silky-smooth consistency. If your blender struggles, blend in smaller batches or add more liquid.
3. Customize the Flavor
Experiment with add-ins like:
- Fresh dill or chives for a herby twist.
- Smoked paprika for a smoky flavor.
- Maple syrup or agave for a sweet-savory version.
4. Make It Nut-Free
If you have a nut allergy, substitute cashews with silken tofu or sunflower seeds. Soak sunflower seeds for 2 hours before blending.
5. Freeze for Later
This dairy-free sour cream freezes well! Portion into ice cube trays for easy use in sauces or smoothies.
Nutritional Benefits of Dairy-Free Sour Cream
Compared to traditional sour cream, this plant-based version offers several health benefits:
- Lower in Calories: Cashew-based sour cream typically has fewer calories than dairy.
- Rich in Healthy Fats: Cashews contain monounsaturated fats, which support heart health.
- No Cholesterol: Unlike dairy, plant-based sour cream is cholesterol-free.
- Probiotic Potential: If using fermented ingredients (like coconut yogurt), it may support gut health.
- Vitamin & Mineral Boost: Nutritional yeast adds B vitamins, while cashews provide magnesium and zinc.
Frequently Asked Questions (FAQs)
Can I make this without a blender?
While a blender is ideal, you can use a food processor or even a hand mixer (though the texture may be slightly grainier).
How long does dairy-free sour cream last?
Stored in an airtight container, it lasts 5-7 days in the fridge. For longer storage, freeze for up to 3 months.
Can I use this in cooking?
Yes! It works well in baking, sauces, and soups. However, avoid boiling it, as high heat may cause separation.
Is this recipe keto-friendly?
Yes! Cashews are low-carb, and this recipe contains less than 2g net carbs per serving, making it keto-approved.
What’s the best substitute for cashews?
For a nut-free version, try silken tofu, coconut cream, or sunflower seeds. Each will yield a slightly different texture.
Final Thoughts: Why This Recipe Works
This 10-minute dairy-free sour cream is a must-try for anyone looking to enjoy a creamy, tangy condiment without dairy. It’s:
- Quick & Easy: Ready in just 10 minutes with minimal effort.
- Versatile: Use it in dips, toppings, baking, and more.
- Healthier: Lower in saturated fat and free from dairy allergens.
- Customizable: Adjust flavors to suit your taste.
Whether you’re vegan, lactose intolerant, or simply exploring plant-based alternatives, this recipe is a winner. Give it a try and taste the difference!
Try It Today & Share Your Results!
Ready to make your own dairy-free sour cream? Gather your ingredients and follow the steps above—you’ll be amazed at how simple and delicious it is!
Once you’ve tried it, we’d love to hear from you! Leave a comment below with your favorite way to use it or tag us on social media with your creations. Don’t forget to pin this recipe for later and share it with friends who love plant-based cooking.
Happy cooking!