
How to Make a Vegan Fruit Tart with a Gluten-Free Crust
Imagine biting into a luscious, creamy tart filled with fresh, juicy fruits—all atop a crisp, gluten-free crust. Sounds like a dream, right? Well, it’s entirely possible, and I’m here to guide you through creating a vegan fruit tart that’s not only delicious but also free from gluten and animal products. Whether you’re vegan, gluten-sensitive, or just looking to try something new, this recipe is a winner. Let’s dive in!
Why You’ll Love This Recipe
First off, this tart is incredibly versatile. You can swap out the fruits based on the season or your personal preference—strawberries in summer, apples in fall, or even tropical fruits like mango and kiwi. Plus, the gluten-free crust is so easy to make that you’ll wonder why you haven’t tried it before. And the best part? It’s completely dairy-free and egg-free, so everyone at the table can enjoy it without worry.
Another bonus? This tart looks impressive but is simple to assemble. No fancy techniques or hard-to-find ingredients—just a few pantry staples and your favorite fruits. Ready to get started? Let’s go!
Gather Your Ingredients
Before we jump into the steps, let’s make sure you have everything you need. Here’s what you’ll need to make a vegan fruit tart with a gluten-free crust:
For the Gluten-Free Crust:
- 1 ½ cups (150g) gluten-free all-purpose flour (a blend works best)
- ¼ cup (30g) almond flour (for extra richness and texture)
- ¼ cup (50g) coconut sugar (or granulated sugar of choice)
- ½ tsp salt
- ½ cup (115g) cold vegan butter (or coconut oil, solid but not melted)
- 3-4 tbsp ice water
For the Vegan Pastry Cream:
- 1 can (13.5 oz or 400ml) full-fat coconut milk (chilled overnight)
- ¼ cup (50g) coconut sugar
- 3 tbsp cornstarch (or arrowroot powder)
- 1 tsp vanilla extract
- Pinch of salt
For the Fruit Topping:
- 2 cups mixed fresh fruits (berries, kiwi, mango, peaches—whatever you love!)
- Optional: fruit jam for glazing (apricot or strawberry work well)
Step-by-Step Instructions
1. Prepare the Gluten-Free Crust
The crust is the foundation of your tart, so let’s get it right. Here’s how:
Step 1: Mix the dry ingredients. In a large bowl, whisk together the gluten-free flour, almond flour, coconut sugar, and salt. This ensures everything is evenly distributed.
Step 2: Cut in the butter. Add the cold vegan butter (or coconut oil) to the flour mixture. Use a pastry cutter, fork, or even your fingers to work the butter into the flour until the mixture resembles coarse crumbs. You want small, pea-sized pieces of butter—this creates a flaky texture!
Step 3: Add the water. Slowly drizzle in the ice water, one tablespoon at a time, mixing gently with a fork. The dough should come together when pressed but shouldn’t be sticky. Be careful not to overmix!
Step 4: Shape the dough. Turn the dough onto a piece of parchment paper and gently shape it into a disc. Wrap it in plastic and refrigerate for at least 30 minutes. Chilling helps the dough firm up, making it easier to roll out.
Step 5: Roll and bake. Preheat your oven to 350°F (175°C). Roll out the chilled dough between two sheets of parchment paper to fit an 8-inch tart pan. Press the dough into the pan, trim the edges, and prick the bottom with a fork to prevent air bubbles. Bake for 18-20 minutes, or until lightly golden. Let it cool completely before adding the filling.
Pro Tip: If your dough cracks while rolling, don’t worry! Just press it back together with your fingers. The crumbly texture is part of the charm.
2. Make the Vegan Pastry Cream
This creamy filling is the star of the show. Here’s how to make it:
Step 1: Chill the coconut milk. Make sure your coconut milk has been chilled overnight. This helps separate the thick cream from the watery part.
Step 2: Scoop out the cream. Open the can and scoop out the thick cream that’s risen to the top. Leave the watery part behind (you can use it in smoothies!).
Step 3: Whisk the cream. In a saucepan, whisk together the coconut cream, coconut sugar, cornstarch, vanilla extract, and salt. Bring to a gentle simmer over medium heat, whisking constantly to avoid lumps.
Step 4: Thicken the mixture. Keep whisking until the mixture thickens enough to coat the back of a spoon—about 3-5 minutes. It should look like pudding!
Step 5: Cool and chill. Transfer the pastry cream to a bowl and cover with plastic wrap (touching the surface to prevent a skin from forming). Refrigerate for at least 2 hours, or until completely chilled and set.
Pro Tip: If your pastry cream is too thin, let it simmer a little longer. If it’s too thick, whisk in a splash of coconut milk to loosen it.
3. Assemble the Tart
Now comes the fun part—putting it all together!
Step 1: Spread the filling. Once the crust and pastry cream are completely cooled, spread the chilled pastry cream evenly into the tart shell. Smooth the top with a spatula.
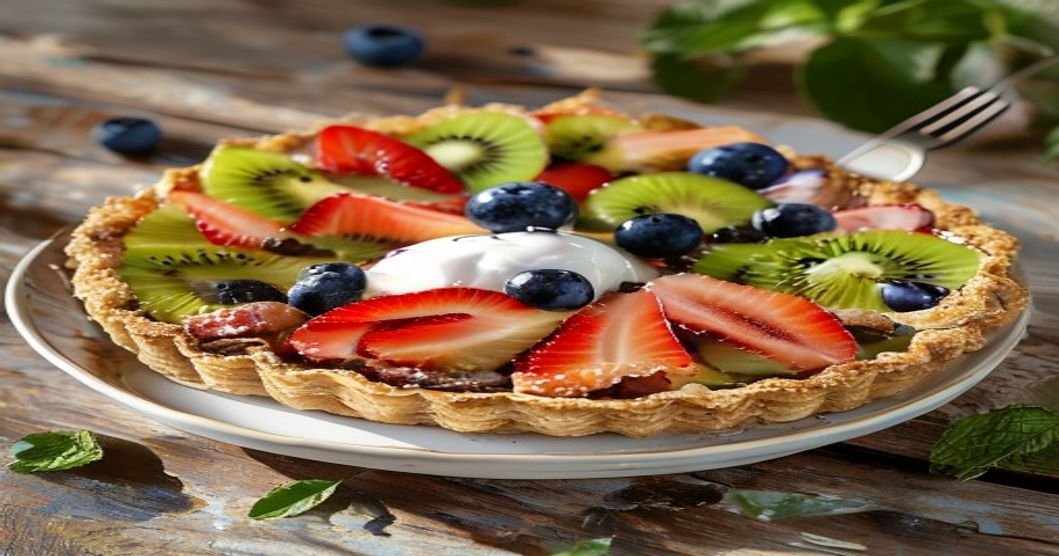
Step 2: Arrange the fruit. Get creative here! Arrange your sliced fruits in a beautiful pattern on top of the cream. Think concentric circles, a spiral, or even a mosaic design. Berries look especially pretty, but don’t be afraid to mix it up with tropical fruits or stone fruits.
Step 3: Glaze (optional). If you want a glossy finish, warm up some fruit jam (like apricot or strawberry) with a teaspoon of water and brush it lightly over the fruit. This step is optional but adds a professional touch.
Step 4: Chill and serve. Pop the tart in the fridge for at least 30 minutes to set. This helps the fruit stay in place and makes slicing easier. Serve chilled with a dollop of coconut whipped cream or a sprinkle of toasted coconut flakes!
Tips for Success
Here are some extra tips to ensure your tart turns out perfectly every time:
- Crust alternatives: If you don’t have gluten-free flour, you can use a mix of almond flour and oat flour (ensure it’s certified gluten-free).
- Fruit prep: Wash and dry your fruits thoroughly to prevent excess moisture from making the crust soggy. If using juicy fruits like berries, pat them dry with a paper towel.
- Make ahead: Both the crust and pastry cream can be made a day in advance. Store them separately in the fridge and assemble the tart the next day for maximum freshness.
- Storage: Keep the tart refrigerated, covered, for up to 3 days. The crust may soften slightly over time, but it’ll still taste delicious!
- Serving suggestions: For a festive touch, dust the tart with powdered sugar or add a sprig of mint as a garnish.
Why This Tart is Perfect for Any Occasion
This vegan fruit tart isn’t just a dessert—it’s a showstopper. Here’s why it’s perfect for any event:
- Parties and gatherings: It’s a crowd-pleaser that’s easy to transport and share. Plus, it’s allergy-friendly, so everyone can enjoy it!
- Dessert for dinner: Light yet satisfying, this tart makes a great end to a meal without being overly heavy.
- Meal prep: Make it ahead for a quick and healthy snack throughout the week.
- Special occasions: Birthdays, holidays, or even just because—this tart is as pretty as it is delicious.
Final Thoughts and a Little Encouragement
If you’ve never made a vegan or gluten-free tart before, don’t let the idea intimidate you. This recipe is forgiving, fun, and foolproof. The worst that can happen? Your crust might not look perfect, but it’ll still taste amazing. And trust me, no one will notice the cracks—just the incredible flavors!
So, what are you waiting for? Grab your ingredients, put on some music, and get baking. I can’t wait to hear how your tart turns out. Be sure to share a photo and tag me—I love seeing your creations!
And hey, if you make this recipe, leave a comment below with your favorite fruit combination or any tips you have. Happy baking!
Your Next Steps
Ready to dive in? Here’s what you can do next:
- Pin this recipe: Save it to your Pinterest board so you can find it later!
- Share with friends: Tag someone who loves fruit tarts or vegan desserts—you might just inspire them to try it too.
- Experiment: Once you’ve mastered the basics, play around with different fruits, crusts, or even add a layer of chocolate ganache for extra decadence.
Enjoy your vegan fruit tart, and remember—baking is all about having fun and savoring the process. Happy baking!