
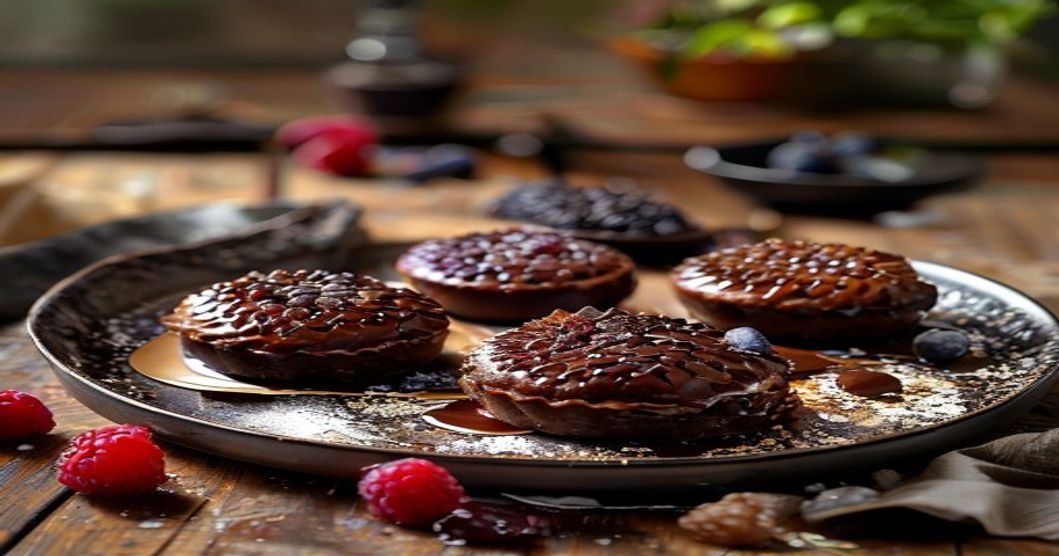
Indulge in these adorable mini chocolate tarts topped with juicy fresh berries! Perfect for parties, meal prep, or a guilt-free treat, these vegan and gluten-free desserts are rich in antioxidants and easy to make. A showstopping individual dessert that’s as delicious as it is healthy!

Mini Chocolate Tarts with Fresh Berries (Individual Dessert Trend)
Discover the best homemade mini chocolate tarts with fresh berries. These easy, healthy desserts are perfect for any occasion. Enjoy rich chocolate flavor and antioxidant-rich berries in perfectly portioned individual treats. Whether hosting a dinner party or craving a sweet snack, these mini tarts deliver indulgence without compromise.
Why You’ll Love These Mini Chocolate Tarts
- Perfectly portioned: Individual servings make these ideal for sharing or enjoying one at a time.
- Nutrient-packed: Made with dark chocolate and fresh berries for a boost of antioxidants.
- Dietary-friendly: Naturally vegan, gluten-free, and refined sugar-free.
- Make-ahead friendly: Prepare the crust and filling in advance for stress-free entertaining.
Ingredients for Mini Chocolate Tarts with Fresh Berries
Makes 12 delicious individual tarts.
For the Chocolate Crust:
- 1 ½ cups (150g) almond flour
- ¼ cup (20g) unsweetened cocoa powder
- 2 tbsp (16g) coconut sugar (or monk fruit sweetener)
- 3 tbsp (45g) melted coconut oil
- 1 tbsp (15ml) maple syrup
- Pinch of sea salt
For the Chocolate Filling:
- ½ cup (120g) full-fat coconut milk (canned, chilled)
- ¼ cup (60g) melted dark chocolate (70%+ cocoa, vegan)
- 2 tbsp (30ml) maple syrup
- 1 tsp vanilla extract
- Pinch of sea salt
For the Topping:
- ½ cup fresh berries (strawberries, raspberries, blueberries)
- 1 tsp chia seeds (optional, for garnish)
- 1 tsp shredded coconut (optional, for garnish)
Step-by-Step Instructions for Perfect Mini Chocolate Tarts
Step 1: Prepare the Chocolate Crust
- Preheat your oven to 350°F (175°C). Lightly grease a mini muffin tin with coconut oil or use silicone liners for easy removal.
- In a medium bowl, combine almond flour, cocoa powder, coconut sugar, and sea salt.
- Add the melted coconut oil and maple syrup to the dry ingredients. Mix until a thick dough forms.
- Scoop 1 teaspoon of dough into each mini muffin cup. Press firmly with your fingers or a small spoon to create an even layer on the bottom and slightly up the sides.
- Bake for 8–10 minutes until the crust is firm. Allow to cool completely before adding the filling.
Step 2: Make the Chocolate Filling
- In a small saucepan, gently warm the coconut milk over low heat (do not boil). Remove from heat immediately.
- Whisk in the melted dark chocolate, maple syrup, vanilla extract, and sea salt until completely smooth and well combined.
- Transfer the mixture to the refrigerator and chill for 15–20 minutes until slightly thickened but still pourable.
Step 3: Assemble the Tarts
- Once the crusts are completely cool, spoon 1 teaspoon of the chocolate filling into each tart shell.
- Top each tart with fresh berries of your choice. Sprinkle with chia seeds or shredded coconut if desired.
- Return the tarts to the refrigerator and chill for at least 30 minutes to allow the filling to set completely.
Step 4: Serve and Enjoy
These mini chocolate tarts are best served chilled or at room temperature. Remove from the fridge 10 minutes before serving to enhance the flavors.
Tips & Tricks for Perfect Mini Chocolate Tarts
- Crust shaping: For a more professional look, press the dough into the muffin cups using a small measuring cup or the back of a spoon to create even edges.
- Chocolate melting: Always use high-quality vegan dark chocolate (70% cocoa or higher) for the best flavor and texture.
- Filling consistency: If your filling becomes too thick while chilling, warm it slightly before spooning into the crusts to make it easier to work with.
- Berry selection: Use a mix of berries for visual appeal — try strawberries, raspberries, and blueberries for a colorful presentation.
- Make ahead: You can prepare the crusts up to 2 days ahead and store them in an airtight container at room temperature. Make the filling and assemble the tarts up to 1 day ahead.
Storage Instructions
Refrigerator Storage:
Store the assembled tarts in an airtight container in the refrigerator for up to 5 days. The crust may soften slightly over time, but the flavor will remain delicious.
Freezer Storage:
For longer storage, freeze the tarts (without topping) in a single layer on a baking sheet for 1 hour. Transfer to a freezer bag or airtight container and freeze for up to 3 months. Thaw overnight in the refrigerator before serving. Add fresh berries after thawing for the best texture.
Variations: 3 Delicious Ways to Customize Your Mini Chocolate Tarts
- Nut-Free Version: Replace the almond flour with oat flour for a nut-free crust that still delivers great texture.
- Protein-Packed Version: Add 2 tablespoons of vanilla protein powder to the crust mixture for an extra protein boost.
- Tropical Twist: Swap the fresh berries for diced mango and toasted coconut flakes for a summery flavor combination.
Serving Suggestions: 3 Creative Ways to Present Your Tarts
- Elegant Presentation: Arrange the tarts on a white platter with fresh mint leaves and a dusting of cocoa powder for a sophisticated look.
- Dessert Board: Create a mini dessert board with your tarts alongside fresh fruit, dark chocolate shavings, and a small bowl of coconut yogurt for dipping.
- Party Favors: Package individual tarts in clear cellophane bags tied with ribbon for a charming party favor or hostess gift.
Frequently Asked Questions
Can I make these tarts ahead of time?
Absolutely! You can prepare the crusts up to 2 days ahead and store them at room temperature. Make the filling and assemble the tarts up to 1 day ahead. Keep refrigerated until ready to serve.
Are these tarts suitable for people with nut allergies?
These tarts contain almond flour, but you can easily make them nut-free by substituting oat flour in the crust. Just ensure all other ingredients are also nut-free.
How long do these tarts stay fresh?
Refrigerated tarts stay fresh for up to 5 days. Frozen (un-topped) tarts can be stored for up to 3 months. Always add fresh berries after thawing.
Can I use a different sweetener?
Yes. You can replace coconut sugar or maple syrup with agave syrup, date syrup, or your preferred liquid sweetener in equal amounts.
What’s the best way to melt chocolate for the filling?
Use a double boiler or microwave in 20-second bursts, stirring between each, until fully melted and smooth. Avoid overheating to prevent burning.
Ready to Bake?
These mini chocolate tarts with fresh berries are the perfect blend of health and indulgence. Whether you’re meal prepping, hosting a party, or treating yourself, they’re a crowd-pleaser in every bite.