Creamy Vegan Coconut Yogurt (Made at Home): A Dairy-Free Delight
In a world where plant-based diets are gaining momentum, homemade vegan coconut yogurt stands out as a creamy, tangy, and nutritious alternative to traditional dairy yogurt. Not only is it free from animal products, but it’s also packed with probiotics, healthy fats, and a rich, tropical flavor. Best of all, you can easily make it in your own kitchen with just a few ingredients and minimal effort.
Whether you’re vegan, lactose intolerant, or simply looking to explore new culinary horizons, this dairy-free yogurt is a game-changer. It’s perfect for breakfast bowls, smoothies, desserts, or even as a savory dip. Plus, homemade versions are free from additives, preservatives, and excess sugars found in store-bought alternatives.
In this guide, we’ll walk you through everything you need to know about making creamy vegan coconut yogurt at home, including the best ingredients, step-by-step instructions, troubleshooting tips, and creative ways to use it. Let’s dive in!
Why Choose Homemade Coconut Yogurt Over Store-Bought?
While store-bought vegan yogurts are convenient, they often come with drawbacks like:
- Additives and thickeners: Many commercial brands contain gums, stabilizers, or artificial flavors to mimic the texture of dairy yogurt.
- High sugar content: Flavored varieties can be loaded with added sugars, making them less healthy.
- Lower probiotic count: Pasteurization and processing can reduce the beneficial bacteria in store-bought yogurts.
- Higher cost: Buying artisanal or organic vegan yogurt regularly can add up over time.
By making coconut yogurt at home, you gain full control over the ingredients, ensuring a pure, probiotic-rich, and customizable product. Plus, it’s incredibly cost-effective and rewarding!
Essential Ingredients for Creamy Vegan Coconut Yogurt
To make the best homemade coconut yogurt, you’ll need a few key ingredients:
1. Coconut Milk (Full-Fat for Creaminess)
The base of your yogurt should be high-quality, full-fat coconut milk. Avoid light or reduced-fat versions, as they lack the richness needed for a thick, creamy texture. Look for:
- Organic coconut milk: Free from additives and preservatives.
- Canned coconut milk: Provides the best consistency (about 60-70% fat content).
- Homemade coconut milk: For an ultra-pure option, blend fresh coconut meat with water and strain.
2. Probiotic Starter (For Fermentation)
Since coconut milk doesn’t contain natural yogurt cultures, you’ll need a probiotic starter to ferment the milk. Options include:
- Store-bought vegan yogurt: Choose an unsweetened, live-culture yogurt (e.g., coconut or almond yogurt).
- Probiotic capsules: Open 1-2 capsules of a high-quality vegan probiotic (look for strains like Lactobacillus acidophilus or Bifidobacterium).
- Yogurt starter powder: Available at health food stores or online, this ensures consistent results.
3. Thickener (Optional, for Extra Creaminess)
If you prefer a thicker yogurt (like Greek-style), consider adding a natural thickener such as:
- Tapioca starch or arrowroot powder: 1-2 tsp per can of coconut milk.
- Chia seeds or flaxseeds: Blend 1 tbsp into the coconut milk before fermenting.
- Agar-agar: A vegan gelatin alternative (½ tsp per can).
4. Sweetener or Flavor Boosters (Optional)
While plain coconut yogurt has a subtle sweetness, you can enhance it with:
- Maple syrup or agave nectar: 1-2 tsp for a touch of sweetness.
- Vanilla extract: ½ tsp for a fragrant twist.
- Citrus zest: Lemon or lime zest for a bright flavor.
- Spices: Cinnamon, cardamom, or turmeric for warmth.
Step-by-Step Guide: How to Make Coconut Yogurt at Home
Follow these simple steps to create your own creamy vegan coconut yogurt. The process takes about 24-48 hours, including fermentation time.
Step 1: Prepare the Coconut Milk
Start by heating the coconut milk to help blend the ingredients smoothly:
- Pour 2 cans (13.5 oz each) of full-fat coconut milk into a saucepan.
- Heat over medium-low heat until warm (do not boil).
- If using a thickener (like tapioca starch), whisk it into a small amount of cold coconut milk to make a slurry, then stir it into the warm milk.
Step 2: Cool the Mixture
Fermentation requires a warm environment, so let the coconut milk cool to 110°F (43°C)—lukewarm to the touch. This prevents killing the probiotics.
- Use a food thermometer for accuracy.
- If the mixture is too hot, let it cool further; if too cool, gently reheat.
Step 3: Add the Probiotic Starter
Once cooled, stir in your chosen starter:
- For store-bought yogurt: 2-3 tbsp per can of coconut milk.
- For probiotic capsules: Open 1-2 capsules and dissolve the powder into the milk.
- For yogurt starter powder: Follow package instructions (usually ¼ tsp per can).
Mix well to distribute the cultures evenly.
Step 4: Ferment the Yogurt
The fermentation process is what transforms the coconut milk into yogurt. Here’s how to do it:
- Incubate: Transfer the mixture to a clean glass jar and cover with a breathable lid (e.g., a cloth or lid with a small vent).
- Keep warm: Place the jar in a warm spot (ideally 105-110°F / 40-43°C). Options include:
- An oven with the light on.
- A yogurt maker.
- A cooler with warm water bottles.
- A seedling heat mat.
- Time: Ferment for 24-48 hours. The longer it ferments, the tangier and thicker it becomes.
Step 5: Check for Doneness
Your yogurt is ready when:
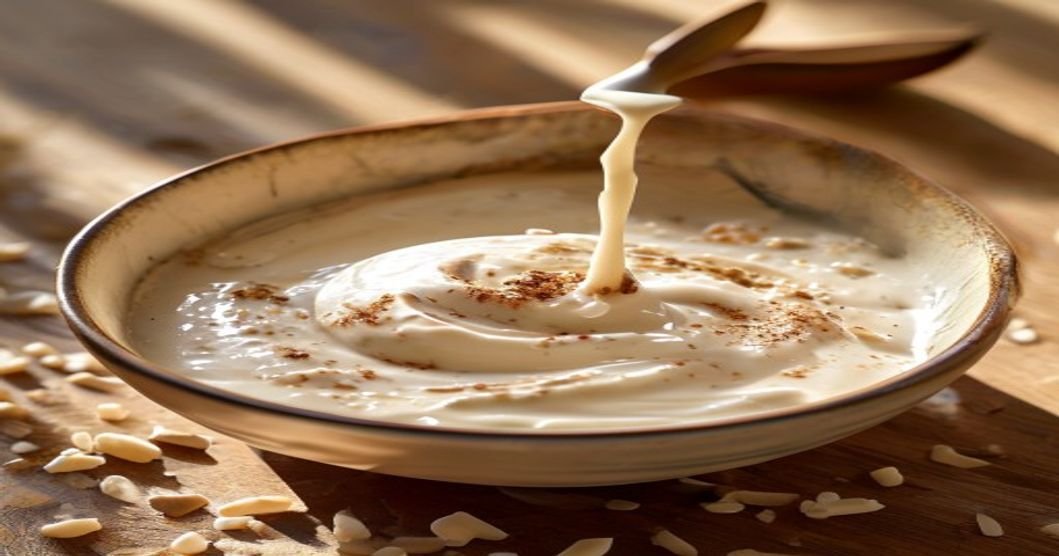
- It has a thick, pudding-like consistency.
- It smells tangy and slightly sour (like dairy yogurt).
- It pulls away from the sides of the jar when tilted.
If it’s too thin, strain it through a cheesecloth for 1-2 hours to thicken. If it’s too sour, reduce fermentation time next batch.
Step 6: Refrigerate and Store
Once fermented, refrigerate the yogurt for at least 4 hours to halt fermentation and set the texture. Store in an airtight container for up to 2 weeks.
Troubleshooting Common Issues
Even with the best intentions, fermentation doesn’t always go as planned. Here’s how to fix common problems:
1. Yogurt Didn’t Thicken
Possible causes:
- Insufficient fermentation time (try 48 hours next time).
- Probiotics weren’t active enough (use a fresh starter).
- Temperature was too low (aim for 105-110°F).
Fix: Strain the yogurt in a cheesecloth for 1-2 hours to remove excess liquid. Add a thickener like tapioca starch in the next batch.
2. Yogurt is Too Sour
Possible causes:
- Over-fermentation (fermented longer than 48 hours).
- High ambient temperature.
Fix: Reduce fermentation time to 24 hours for a milder flavor. Use less starter in the next batch.
3. Yogurt Separated or Curdled
Possible causes:
- Temperature fluctuations during fermentation.
- Contamination from utensils or environment.
Fix: Blend the separated yogurt to recombine it. In the future, sterilize all equipment and maintain a consistent temperature.
4. Yogurt Didn’t Set at All
Possible causes:
- Starter was not viable (check expiration date or potency).
- Antibacterial agents in coconut milk (avoid brands with additives).
- Temperature was too high (killed the probiotics).
Fix: Start over with a fresh starter and ensure proper temperature control.
Creative Ways to Use Your Homemade Coconut Yogurt
Now that you’ve mastered homemade coconut yogurt, it’s time to enjoy it! Here are some delicious ways to incorporate it into your meals:
Breakfast Ideas
- Parfait: Layer yogurt with granola, fresh berries, and a drizzle of honey.
- Overnight oats: Mix yogurt with rolled oats, chia seeds, and almond milk for a creamy breakfast.
- Smoothie bowl: Top yogurt with sliced banana, coconut flakes, and pumpkin seeds.
Savory Applications
- Dip or sauce: Mix with garlic, lemon juice, and herbs for a dairy-free tzatziki.
- Curry base: Stir into Thai or Indian curries for a tangy, creamy element.
- Salad dressing: Combine with olive oil, apple cider vinegar, and mustard for a light dressing.
Desserts and Baking
- Vegan cheesecake: Use yogurt as a base for a dairy-free filling.
- Ice cream: Freeze yogurt with banana slices for a soft-serve treat.
- Panna cotta: Mix with agar-agar and vanilla for a silky dessert.
Health and Beauty
- Face mask: Apply plain yogurt to your face for a hydrating, probiotic-rich mask.
- Hair treatment: Use as a deep conditioning mask for dry or damaged hair.
Tips for Perfect Coconut Yogurt Every Time
To ensure your homemade vegan coconut yogurt turns out perfectly every time, follow these pro tips:
- Use the freshest ingredients: Older coconut milk or probiotics may result in weaker fermentation.
- Sterilize your equipment: Wash jars, utensils, and lids with hot, soapy water and rinse well.
- Maintain consistent temperature: Fluctuations can slow down or ruin fermentation.
- Experiment with flavors: Add vanilla, cocoa powder, or fruit puree after fermentation for variety.
- Save some yogurt as a starter: Reserve 2-3 tbsp of each batch to use as a starter for your next batch (for up to 5 generations).
- Strain for Greek-style yogurt: For a thicker texture, strain the yogurt in a cheesecloth for 2-4 hours.
Frequently Asked Questions (FAQs)
Can I make coconut yogurt without a starter?
No, coconut milk lacks the natural yogurt cultures needed for fermentation. You must use a probiotic starter or store-bought vegan yogurt.
How long does homemade coconut yogurt last?
Properly stored in the fridge, it lasts 1-2 weeks. For longer storage, freeze it in ice cube trays and thaw as needed (texture may be slightly grainy after freezing).
Is coconut yogurt as probiotic-rich as dairy yogurt?
Yes! The probiotic strains used are the same (e.g., Lactobacillus), and homemade versions often have a higher count since they’re not pasteurized.
Can I use powdered coconut milk?
It’s possible but not ideal. Powdered coconut milk lacks the fat content needed for a creamy texture. Fresh or canned coconut milk works best.
Why is my yogurt grainy?
Graininess can occur if the coconut milk isn’t blended smoothly or if the fermentation temperature fluctuates. Strain the yogurt or blend it after fermentation to smooth it out.
Final Thoughts: Why Homemade Coconut Yogurt is Worth the Effort
Making creamy vegan coconut yogurt at home is a rewarding process that yields a delicious, probiotic-rich, and customizable dairy-free alternative. Not only does it save you money in the long run, but it also allows you to control the ingredients, flavors, and texture to suit your preferences.
Whether you’re vegan, lactose intolerant, or simply a food enthusiast, this recipe is a fantastic addition to your culinary repertoire. Experiment with different flavors, thickeners, and fermentation times to find your perfect match. Plus, the satisfaction of creating a nourishing food from scratch is unmatched!
Ready to give it a try? Grab some full-fat coconut milk and a probiotic starter, and start your fermentation journey today. Your taste buds—and your gut—will thank you!
Call to Action (CTA)
Love the idea of making your own homemade coconut yogurt? Now’s the perfect time to start! Here’s what you can do next:
- Share your creation: Tag us on social media with your coconut yogurt masterpiece and use the hashtag #HomemadeCoconutYogurt.
- Experiment with flavors: Try adding matcha, berries, or cacao to your next batch.
- Subscribe for more recipes: Join our newsletter for weekly plant-based recipes, tips, and exclusive content delivered to your inbox.
- Check out our other guides: Learn how to make vegan cheese, kefir, or fermented vegetables for more gut-friendly delights!
Happy fermenting!