
Crispy Pan-Fried Potato and Onion Pierogies: A Comfort Food Delight
There’s something undeniably comforting about a perfectly cooked pierogi—especially when it’s loaded with tender potatoes and sweet caramelized onions, then finished with a crispy, golden pan-fry. These Crispy Pan-Fried Potato and Onion Pierogies are a crowd-pleaser, offering a harmonious blend of textures and flavors that make them irresistible whether served as an appetizer, side dish, or even a hearty main course.
In this recipe, we’ll walk you through the process of making homemade pierogies from scratch, ensuring they’re fluffy on the inside and crispy on the outside. Whether you’re a seasoned cook or a beginner, this guide will help you achieve pierogi perfection every time.
Why You’ll Love This Recipe
- Homemade Goodness: Fresh pierogies taste infinitely better than store-bought, and making them at home allows you to customize the filling and texture to your liking.
- Versatile Serving Options: Enjoy these pierogies as a side dish with grilled meats, a vegetarian main course, or even as a snack straight from the pan.
- Make-Ahead Friendly: You can prepare the dough and filling in advance, making it easy to assemble and cook when you’re ready.
- Crowd-Pleasing Flavor: The combination of potatoes and onions is a classic for a reason—it’s hearty, savory, and universally appealing.
The Secret to Perfect Pierogies
Achieving the ideal pierogi involves a few key steps: creating a tender dough, preparing a flavorful filling, and mastering the art of pan-frying for that coveted crispiness. Here’s how to nail each step:
1. The Dough: Soft and Pliable
The foundation of any great pierogi is its dough. A well-made dough should be soft, pliable, and easy to work with, yet sturdy enough to hold its shape during boiling and frying.
- Ingredients: All-purpose flour, eggs, warm water, and a pinch of salt. Some recipes include a bit of sour cream or butter for extra richness, but the classic version keeps it simple.
- Kneading and Resting: Knead the dough until it’s smooth and elastic, then let it rest for at least 30 minutes. This resting period relaxes the gluten, making the dough easier to roll out thinly without shrinking back.
- Rolling Technique: Roll the dough out to about 1/8-inch thickness. Use a round cutter or a glass to create even circles—about 3 to 4 inches in diameter—for the pierogies.
2. The Filling: Creamy Potatoes and Sweet Onions
The filling is where the magic happens. For these pierogies, we’re using a classic potato and onion combination, seasoned simply with salt, pepper, and a touch of butter for richness.
- Potato Preparation: Russet or Yukon Gold potatoes work best for their fluffy texture. Boil them until tender, then mash them while still warm. Avoid over-mixing to keep them light.
- Onion Caramelization: Thinly slice the onions and cook them slowly over low heat until they’re deeply caramelized and sweet. This step is crucial—it adds depth and sweetness to the filling.
- Seasoning: Mix the mashed potatoes with the caramelized onions, salt, and pepper to taste. Some recipes add a bit of cheese, like farmer’s cheese or cheddar, for extra creaminess.
3. Assembly: Folding with Precision
Assembling pierogies is a labor of love, but it’s also where you can get creative with shapes and sizes. Traditional pierogies are half-moon shaped, but you can also make small round ones (pirog) or even square ones.
- Filling Amount: Place about 1 to 2 teaspoons of filling in the center of each dough circle. Be careful not to overfill, or the pierogies may burst during cooking.
- Sealing the Edges: Fold the dough over the filling to create a half-moon shape, then press the edges firmly with your fingers or a fork to seal. Ensure there are no gaps to prevent water from seeping in during boiling.
- Docking: Use a fork to poke a few small holes in each pierogi. This prevents them from puffing up too much during boiling and ensures even cooking.
4. Cooking: Boiling and Frying for Texture
The two-step cooking process—boiling followed by pan-frying—is what gives pierogies their signature texture: tender inside and crispy outside.
- Boiling: Bring a large pot of salted water to a gentle boil. Add the pierogies in batches (don’t overcrowd the pot) and cook for 3 to 5 minutes, or until they float to the surface. Remove them with a slotted spoon and drain well.
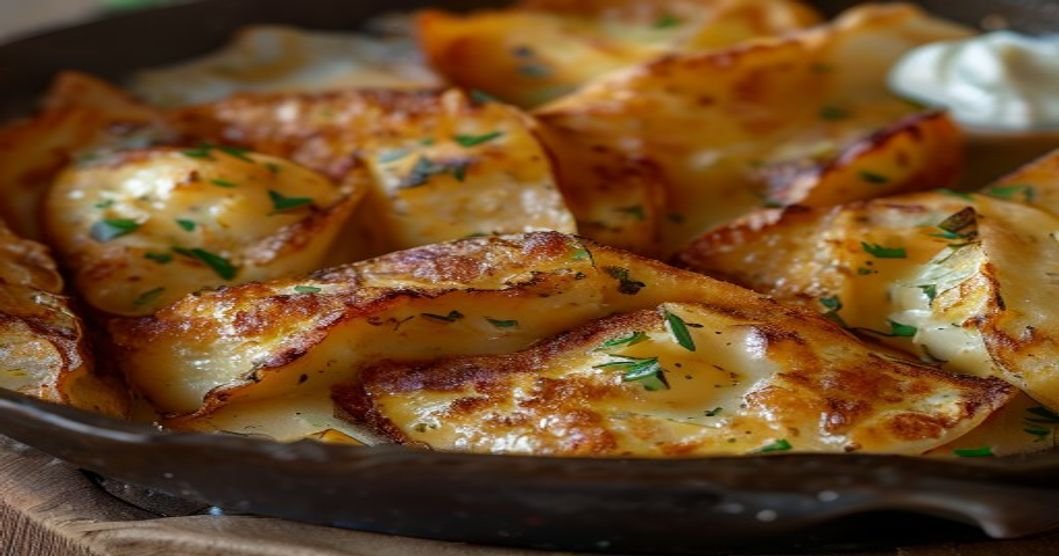
- Pan-Frying: Heat a generous amount of butter or oil in a skillet over medium heat. Add the boiled pierogies in a single layer (work in batches if necessary) and fry for 2 to 3 minutes per side, until golden and crispy.
- Serving: Serve hot with a dollop of sour cream, a sprinkle of fresh chives, or a side of applesauce for dipping.
Pro Tips for Pierogi Perfection
Follow these expert tips to ensure your pierogies turn out flawless every time:
- Keep the Dough Covered: While working, cover the dough with a damp towel to prevent it from drying out and cracking.
- Use Cold Water for Boiling: Adding pierogies to cold water and bringing it to a boil gently prevents them from sticking to the bottom of the pot.
- Don’t Skip the Resting Step: Letting the dough rest after kneading ensures it rolls out smoothly without shrinking.
- Freeze for Later: If you’re making pierogies ahead of time, freeze the uncooked ones on a baking sheet before transferring them to a freezer bag. They’ll keep for up to 3 months. Cook from frozen, adding a minute or two to the boiling time.
- Experiment with Fillings: While potato and onion is a classic, don’t be afraid to try other fillings like sauerkraut and mushrooms, cheese and spinach, or even sweet versions with cottage cheese and berries.
Serving Suggestions
These Crispy Pan-Fried Potato and Onion Pierogies are incredibly versatile. Here are a few ways to serve them:
- As a Side Dish: Pair them with grilled sausages, roasted meats, or a fresh salad for a hearty meal.
- Vegetarian Main Course: Serve a generous portion with a side of sautéed vegetables, a dollop of sour cream, and a sprinkle of fresh herbs.
- Appetizer: Cut the pierogies into bite-sized pieces and serve them on a platter with a side of sour cream or a tangy dipping sauce.
- Comfort Food Bowl: Top a bowl of mashed potatoes with pan-fried pierogies, caramelized onions, and a drizzle of gravy for the ultimate comfort meal.