
Fluffy Dairy-Free Garlic Knot Bread: A Delicious Vegan Twist on a Classic Favorite
There’s something irresistibly comforting about warm, fluffy garlic knots fresh from the oven. The soft, pillowy dough, the aromatic garlic butter, and the perfect balance of savory and herby flavors make them a crowd-pleaser. But what if you’re avoiding dairy? Does that mean you have to miss out on this culinary delight? Absolutely not!
This fluffy dairy-free garlic knot bread recipe is here to prove that you don’t need butter or cheese to create a show-stopping appetizer or side dish. Whether you’re vegan, lactose intolerant, or simply looking to reduce dairy in your diet, this recipe delivers all the flavor and texture of traditional garlic knots—without the dairy. Plus, it’s easy to make with simple ingredients you likely already have in your pantry.
In this guide, we’ll walk you through everything you need to know to make the perfect dairy-free garlic knots, from choosing the right ingredients to mastering the dough. We’ll also share tips for customizing the recipe, storing leftovers, and even turning this into a meal with a few simple additions. Let’s get started!
Why You’ll Love This Dairy-Free Garlic Knot Bread
Before we dive into the recipe, let’s talk about why this dairy-free version is just as good—if not better—than the original. Here are a few reasons to love this recipe:
- Allergy-Friendly: This recipe is naturally dairy-free, making it safe for those with lactose intolerance or a dairy allergy. It’s also vegan-friendly if you use plant-based ingredients.
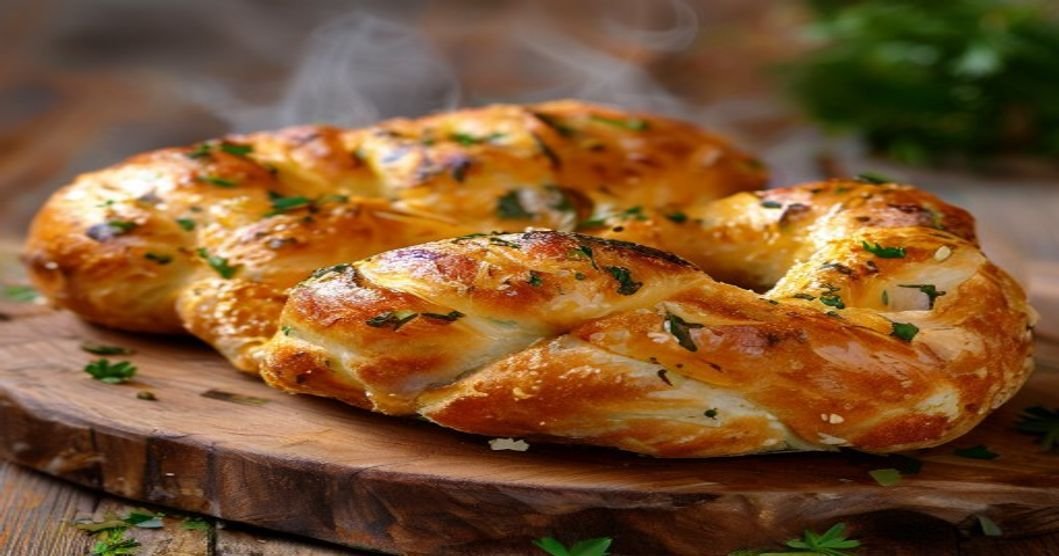
- Soft and Fluffy Texture: The dough is light, airy, and pillowy, thanks to the right combination of ingredients and techniques. No dense or dry knots here!
- Bursting with Garlic Flavor: The garlic butter (or oil) soaks into the knots, infusing every bite with a rich, savory taste. You won’t miss the dairy one bit.
- Versatile: Serve these garlic knots as an appetizer, side dish, or even as part of a meal. They pair perfectly with soups, salads, pasta, or even as a snack on their own.
- Easy to Customize: Add your favorite herbs, spices, or even a sprinkle of dairy-free cheese to make this recipe your own.
The Key Ingredients for Fluffy Dairy-Free Garlic Knots
Creating the perfect dairy-free garlic knots starts with the right ingredients. Here’s what you’ll need and why each one matters:
For the Dough:
- All-Purpose Flour: The base of your dough. All-purpose flour works best for a soft, tender texture. You can substitute a portion with whole wheat flour for a nuttier flavor, but the knots may be slightly denser.
- Instant Yeast: This helps the dough rise quickly and gives the knots their fluffy texture. Make sure your yeast is fresh for the best results.
- Warm Water: Activates the yeast. The water should be warm (around 110°F or 43°C) but not too hot, or it will kill the yeast.
- Sugar: Feeds the yeast and helps it activate. You can use granulated sugar, coconut sugar, or even maple syrup.
- Olive Oil: Adds moisture and richness to the dough. It also helps create a soft, tender crumb.
- Salt: Enhances the flavor of the dough and balances the sweetness from the sugar.
For the Garlic Topping:
- Dairy-Free Butter or Olive Oil: The base of your garlic topping. Use a high-quality dairy-free butter (like Earth Balance or Miyoko’s) or extra-virgin olive oil for a rich, savory flavor.
- Fresh Garlic: The star of the show! Fresh garlic cloves, minced or pressed, will give you the best flavor. Avoid pre-minced garlic from a jar, as it can be bland and lack the punch of fresh garlic.
- Dried Herbs: Classic choices include parsley, oregano, and basil. Fresh herbs work too, but dried herbs are more convenient and have a longer shelf life.
- Garlic Powder: Adds an extra layer of garlic flavor. It’s optional but highly recommended for garlic lovers.
- Salt: Enhances the flavors of the garlic and herbs. Adjust to taste.
- Dairy-Free Parmesan (Optional): If you want to add a cheesy touch, sprinkle some dairy-free parmesan on top before baking. Brands like Violife or Follow Your Heart make great options.
Step-by-Step Instructions for Fluffy Dairy-Free Garlic Knots
Now that you have your ingredients ready, let’s dive into the step-by-step process for making these delicious dairy-free garlic knots. Don’t worry—it’s easier than you think!
Step 1: Activate the Yeast
In a small bowl, combine warm water, sugar, and instant yeast. Stir gently and let it sit for about 5-10 minutes until the mixture becomes frothy. This step ensures that your yeast is active and ready to make your dough rise. If the mixture doesn’t froth, your yeast may be expired, and you’ll need to start over with fresh yeast.
Step 2: Mix the Dough
In a large mixing bowl, combine the flour and salt. Make a well in the center and pour in the yeast mixture and olive oil. Stir with a wooden spoon or dough whisk until a shaggy dough forms. If the dough is too sticky, add a little more flour, one tablespoon at a time. If it’s too dry, add a splash of water.
Step 3: Knead the Dough
Turn the dough out onto a lightly floured surface and knead for about 5-7 minutes until it becomes smooth and elastic. You can also use a stand mixer with a dough hook attachment for this step. Kneading develops the gluten in the flour, which gives the dough its structure and helps it rise properly.
Step 4: Let the Dough Rise
Place the dough in a lightly oiled bowl, cover it with a clean kitchen towel or plastic wrap, and let it rise in a warm, draft-free place for about 1-2 hours, or until it has doubled in size. This step is crucial for achieving fluffy, light garlic knots. If your kitchen is cool, you can place the bowl in a slightly warm oven (turned off) to speed up the process.
Step 5: Shape the Garlic Knots
Once the dough has risen, punch it down gently to release the air. Turn it out onto a lightly floured surface and divide it into 12-16 equal pieces. Roll each piece into a rope about 6-8 inches long, then tie it into a knot. Place the knots on a parchment-lined baking sheet, leaving a little space between each one to allow for rising.
Step 6: Let the Knots Rise Again
Cover the knots with a kitchen towel and let them rise for another 20-30 minutes while you preheat your oven to 375°F (190°C). This second rise ensures that your knots will be light and fluffy.
Step 7: Bake the Knots
Bake the knots for 12-15 minutes, or until they are golden brown. While they’re baking, prepare the garlic topping.
Step 8: Prepare the Garlic Topping
In a small saucepan, melt the dairy-free butter (or heat the olive oil) over low heat. Add the minced garlic, dried herbs, garlic powder, and salt. Cook for 1-2 minutes, stirring constantly, until the garlic is fragrant but not browned. Be careful not to burn the garlic, as it can turn bitter.
Step 9: Coat the Knots in Garlic Topping
As soon as the knots come out of the oven, brush them generously with the garlic topping. Make sure to coat each knot evenly for maximum flavor. If you’re using dairy-free parmesan, sprinkle it on top now.
Step 10: Serve and Enjoy!
Let the knots cool for a few minutes, then serve them warm. They’re best enjoyed fresh out of the oven, but leftovers can be stored and reheated (more on that later).
Tips for the Best Dairy-Free Garlic Knots
Want to take your garlic knots to the next level? Here are some expert tips to ensure they turn out perfectly every time:
1. Use Fresh Yeast
Yeast is a living organism, and its effectiveness can diminish over time. Always check the expiration date on your yeast packet, and if you’re unsure, test it in warm water with a pinch of sugar before using it. If it doesn’t froth, it’s time to buy a new packet.
2. Don’t Over-Knead the Dough
Kneading is important for developing gluten, but over-kneading can make the dough tough. Stop kneading once the dough is smooth and elastic. If you’re using a stand mixer, knead on low speed for no more than 5-7 minutes.
3. Let the Dough Rise Properly
Rushing the rising process can result in dense, flat garlic knots. Be patient and let the dough rise until it has doubled in size. If your kitchen is cool, place the dough in a slightly warm oven (turned off) or near a warm spot to encourage rising.
4. Use Fresh Garlic
Fresh garlic cloves will give you the best flavor. Avoid pre-minced garlic from a jar, as it can be bland and lack the punch of fresh garlic. If you’re short on time, you can use a garlic press to mince the cloves quickly.
5. Brush the Knots While Warm
The garlic topping will soak into the knots better if you brush them while they’re still warm. This ensures that every bite is packed with flavor. If you’re making the knots ahead of time, reheat them before brushing on the garlic topping.
6. Experiment with Herbs and Spices
Don’t be afraid to get creative with your garlic topping. Try adding a pinch of red pepper flakes for heat, or swap out the dried herbs for fresh ones like rosemary or thyme. You can also add a sprinkle of nutritional yeast for a cheesy, umami flavor.
7. Make It a Meal
Garlic knots are delicious on their own, but they also make a great side dish for pasta, soup, or salad. Serve them with a bowl of dairy-free marinara sauce for dipping, or pair them with a hearty vegan chili or stew.
How to Store and Reheat Leftover Garlic Knots
If you somehow have leftovers (which is rare, because these knots are that good!), here’s how to store and reheat them to keep them fresh and delicious:
Storing:
- Room Temperature: Store leftover garlic knots in an airtight container at room temperature for up to 2 days. Make sure they’re completely cooled before storing to prevent condensation, which can make them soggy.
- Refrigerator: For longer storage, place the knots in an airtight container and refrigerate for up to 5 days. The garlic topping may solidify in the fridge, so you’ll need to reheat the knots to soften it.
- Freezer: To freeze, place the cooled knots in a single layer on a baking sheet and freeze until solid. Then transfer them to a freezer-safe bag or container and freeze for up to 3 months. This prevents the knots from sticking together.
Reheating:
- Oven: Preheat your oven to 350°F (175°C). Place the knots on a baking sheet and warm them for 5-10 minutes, or until heated through. If the garlic topping has solidified, brush the knots with a little more dairy-free butter or olive oil before reheating.
- Toaster Oven: For a quick reheat, use a toaster oven. Warm the knots for 3-5 minutes.