

Craving pizza but want a protein-packed twist? This Greek yogurt pizza dough comes together in minutes with no yeast and no wait time. Ready to bake in under 20 minutes, it’s the easiest homemade pizza crust you’ll ever make!
Greek Yogurt Pizza Dough: No Yeast, No Waiting, Just Protein
Why You’ll Love This Protein-Packed Greek Yogurt Pizza Dough
Tired of waiting for dough to rise? This easy Greek yogurt pizza dough delivers a high-protein, vegan-friendly crust in just 10 minutes of active prep time. With no yeast and no complicated techniques, you can have homemade pizza ready faster than delivery. Plus, each slice packs 15g of protein from Greek yogurt—perfect for fitness enthusiasts and busy families alike.
Why This Recipe Works
- No yeast = no rising time, no waiting
- High-protein from Greek yogurt (15g per ½ cup)
- Vegan-friendly when using plant-based yogurt
- Ready in 10 minutes from mixing to baking
Greek Yogurt Pizza Dough: Ingredients You’ll Need
For the Dough
- 1 cup (240g) plain Greek yogurt (unsweetened, full-fat or 2%)
- 2 cups (250g) all-purpose flour or whole wheat flour
- 1 tsp baking powder (for rise without yeast)
- 1 tsp salt
- 1 tbsp olive oil (optional, for texture)
For Toppings (Suggested)
- Marinara sauce (check for vegan-friendly brands)
- Vegan cheese shreds (optional)
- Fresh vegetables (spinach, bell peppers, mushrooms)
- Fresh herbs (basil, oregano)
Step-by-Step Instructions for Perfect Greek Yogurt Pizza Dough
Step 1: Mix the Dough
- In a large bowl, combine Greek yogurt, flour, baking powder, and salt until fully incorporated.
- Mix until a shaggy dough forms (about 2 minutes).
- If the dough is too sticky, add 1-2 tbsp more flour; if too dry, add 1 tsp water.
Step 2: Rest the Dough (Optional)
For best texture, let the dough rest for 10 minutes at room temperature (or up to 30 minutes in the fridge). This step helps the gluten relax for easier shaping.
Step 3: Shape the Crust
- Preheat your oven to 425°F (220°C). Line a baking sheet with parchment paper.
- Divide the dough into 2-4 portions for personal pizzas or one large pizza.
- Roll or stretch the dough to your desired thickness (¼-inch for crispy crust, ½-inch for chewy texture).
Step 4: Pre-Bake (Optional)
For extra crispiness, bake the crust alone for 5-7 minutes before adding toppings. This creates a sturdy base that won’t get soggy.
Step 5: Add Toppings & Bake
- Spread your favorite marinara sauce evenly over the pre-baked crust.
- Add vegan cheese shreds (if using) and your choice of fresh vegetables.
- Bake for 10-12 minutes until the crust is golden brown and the cheese is melted.
Why This Recipe Stands Out
- High-protein crust: Each serving provides 15g of protein from Greek yogurt
- No yeast required: Bypass the rising time with baking powder
- Vegan adaptable: Works with plant-based yogurt and cheese
- Quick preparation: Ready in under 20 minutes from start to finish
Tips & Tricks for the Best Greek Yogurt Pizza Dough
- Flour variations: Swap half the all-purpose flour with whole wheat flour for extra fiber, or use almond flour for a lower-carb option.
- Dough consistency: The dough should be slightly tacky but not sticky. Adjust with flour or water as needed.
- Freezing dough: Shape crusts and freeze on a tray before transferring to a bag. Bake from frozen, adding 2-3 extra minutes.
- Topping ideas: Try pesto instead of marinara, or add roasted vegetables for deeper flavor.
Storage Instructions for Your Greek Yogurt Pizza Dough
Refrigerator Storage
Store leftover dough in an airtight container in the refrigerator for up to 3 days. Bring to room temperature before shaping and baking for best results.
Freezer Storage
Shape dough into crusts and freeze on a parchment-lined tray. Once solid, transfer to a freezer bag for up to 1 month. Thaw overnight in the fridge before baking.
Reheating Instructions
For best texture, reheat pizza slices in a skillet over medium heat for 2-3 minutes or in an air fryer at 350°F for 3 minutes. This prevents soggy crusts.
Delicious Variations on This Greek Yogurt Pizza Dough
Mediterranean-Inspired Pizza
Top with hummus instead of marinara, add kalamata olives, red onions, and feta cheese (or vegan feta) for a Mediterranean twist.
BBQ Chicken Pizza
Use BBQ sauce as your base, then add shredded cooked chicken (or plant-based chicken), red onions, and cilantro. Finish with a drizzle of Greek yogurt for creaminess.
Breakfast Pizza
Swap marinara for a thin layer of cream cheese or pesto. Top with scrambled eggs (or tofu scramble), spinach, and cherry tomatoes for a protein-packed breakfast.
Serving Suggestions for Your Homemade Pizza
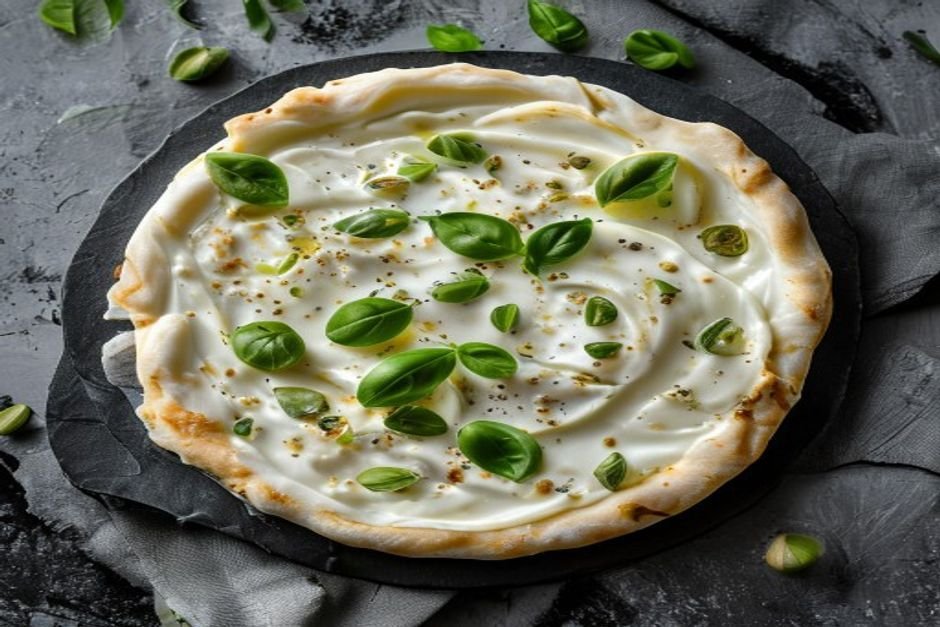
- Classic Margherita: Fresh basil, tomato slices, and vegan mozzarella create a timeless combination.
- Veggie Supreme: Load up on bell peppers, mushrooms, onions, and olives for a hearty vegetarian option.
- Spicy Arrabbiata: Add red pepper flakes to your marinara sauce and top with jalapeños and vegan pepperoni for a kick.
Frequently Asked Questions
Can I make this dough ahead of time?
Yes! You can prepare the dough up to 3 days ahead and store it in the refrigerator. For best results, let it come to room temperature before shaping. Alternatively, shape crusts and freeze them for up to 1 month.
Is this recipe vegan?
This recipe is naturally vegan when using plant-based yogurt and vegan cheese. All other ingredients are already plant-based, making it a great option for vegan diets.
How long does the dough keep in the freezer?
Shaped pizza crusts can be frozen for up to 1 month. Make sure to wrap them tightly in plastic wrap and store in a freezer bag to prevent freezer burn.
What’s the best flour to use for crispy crust?
For the crispiest crust, use all-purpose flour. Whole wheat flour will make a slightly denser crust, while almond flour creates a tender but less crispy texture.
Can I use this dough for other recipes?
Absolutely! This versatile dough works great for flatbreads, calzones, or even as a base for savory tarts. Just adjust baking times as needed for different shapes.
You might also enjoy our other healthy recipes. Browse all recipes →
Did you make this recipe? Leave a comment below and let us know how it turned out! ⭐