
How to Make Vegan Yogurt at Home (No Fancy Equipment Needed)
Here’s the fixed HTML with optimized images and attributes:
If you’re looking for a creamy, tangy, and nutritious alternative to dairy yogurt, homemade vegan yogurt is the perfect solution. Not only is it packed with plant-based probiotics, but it’s also incredibly easy to make with minimal ingredients and zero fancy equipment. Best of all, you can customize flavors, textures, and sweeteners to suit your taste. Whether you’re vegan, lactose intolerant, or just curious about plant-based foods, this step-by-step guide will walk you through the entire process—no yogurt maker required!

Why Make Vegan Yogurt at Home?
There are plenty of reasons to ditch store-bought vegan yogurt in favor of homemade:
- Cost-Effective: Store-bought vegan yogurts can be pricey, especially organic or specialty brands. Making it at home saves you money in the long run.
- Customizable: You control the ingredients, sweetness, and thickness. Add your favorite fruits, nuts, or sweeteners to create a yogurt that’s uniquely yours.
- Probiotic-Rich: Homemade vegan yogurt is teeming with live cultures that support gut health—something often lacking in commercial versions.
- Eco-Friendly: Reduce plastic waste by eliminating store-bought yogurt containers from your routine.
- No Fancy Equipment Needed: You don’t need a yogurt maker, Instant Pot, or other appliances. A simple pot, thermometer (optional), and a warm spot in your home will do the trick.
Ingredients You’ll Need
You only need a few simple ingredients to make vegan yogurt at home. The star of the show is your choice of plant-based milk, but the real magic happens with the starter culture.
Base Ingredients
- Plant-Based Milk: You can use any unsweetened, unflavored plant milk, but some work better than others:
- Coconut Milk: Thick and rich, it makes a creamy yogurt that’s naturally sweet and tangy.
- Cashew Milk: Neutral in flavor and ultra-creamy, perfect for a smooth yogurt.
- Almond Milk: Light and slightly nutty. Opt for unsweetened and full-fat for best results.
- Soy Milk: High in protein, which helps the yogurt thicken naturally. Choose an unsweetened variety.
- Oat Milk: Mild and slightly sweet, but it can be thin unless you add a thickener like agar-agar or pectin.
- Starter Culture: This is what ferments the milk and turns it into yogurt. You have a few options:
- Store-Bought Vegan Yogurt: Look for a plain, unsweetened yogurt with live cultures (e.g., coconut or almond yogurt). Ensure it’s dairy-free.
- Probiotic Capsules: Open 1-2 capsules of vegan probiotics (ensure they contain Lactobacillus bulgaricus or Streptococcus thermophilus) and use the powder as your starter.
- Previous Batch of Homemade Yogurt: Once you’ve made your first batch, you can use 2-3 tablespoons of it to start the next batch.
- Sweetener (Optional): Add a touch of sweetness with maple syrup, agave, or coconut sugar. Stir it in after fermentation if desired.
- Thickener (Optional): For a thicker yogurt, add:
- 1-2 teaspoons of agar-agar or pectin.
- 2 tablespoons of tapioca starch or cornstarch (mixed with a little cold milk first).
- 1-2 tablespoons of chia seeds or flaxseeds (blended into the milk).
Equipment Checklist
You won’t need any specialized gadgets, but having these tools on hand will make the process smoother:
- A medium saucepan with a heavy bottom.
- A thermometer (optional but helpful for accuracy).
- A whisk or spoon for stirring.
- A clean glass jar or bowl for fermentation (quart-sized mason jars work well).
- A warm spot for incubation, such as:
- An oven with the light turned on.
- A cooler with warm water bottles.
- A warm cupboard or pantry.
- A seedling heat mat.
- A clean kitchen towel or paper towels to cover the jar.
- A blender or food processor (if using nuts or seeds for thickening).

Step-by-Step Guide to Making Vegan Yogurt
Step 1: Prepare Your Milk
Start by heating your plant-based milk in a saucepan over medium heat. If you’re using a thickener like agar-agar or starch, whisk it into the cold milk first, then heat. Stir frequently to prevent scorching.
Heat the milk to 180°F (82°C). This step is crucial because it:
- Pasteurizes the milk, killing any unwanted bacteria.
- Denatures the proteins, which helps the yogurt thicken properly.
- Improves the texture and creaminess.
If you don’t have a thermometer, look for tiny bubbles forming around the edges of the pan and steam rising from the milk. Remove the milk from heat and let it cool to 110°F (43°C). This is the ideal temperature for the starter culture to thrive. You can speed up cooling by placing the pot in a bowl of ice water for a few minutes.

Step 2: Add the Starter Culture
Once the milk has cooled to 110°F (43°C), it’s time to add your starter culture. Choose one of the following methods based on what you have available:
- Using Store-Bought Vegan Yogurt: Stir 2-3 tablespoons of plain, unsweetened vegan yogurt into the warm milk until fully dissolved.
- Using Probiotic Capsules: Open 1-2 capsules and whisk the powder into the milk.
- Using a Previous Batch: Add 2-3 tablespoons of your last homemade yogurt batch to the milk.
Pro Tip: Reserve a small portion of your starter culture to use in your next batch. This ensures you always have a reliable fermenting agent on hand!

Step 3: Incubate the Yogurt
Pour the milk-starter mixture into a clean glass jar or bowl. Cover it loosely with a kitchen towel or paper towel to allow for airflow while keeping out dust and debris. Secure the cover with a rubber band or lid (if using a jar with a lid, leave it slightly ajar to release pressure).
Place the jar in your chosen warm spot and let it ferment for 8-24 hours. The longer it ferments, the tangier and thicker it will become. Here’s a quick guide:
- 8-12 Hours: Mild flavor, thinner consistency. Great for a sweeter yogurt.
- 12-18 Hours: Balanced tanginess and thickness. Ideal for most uses.
- 18-24 Hours: Very tangy and thick, almost like Greek yogurt. Perfect for savory dishes or smoothies.
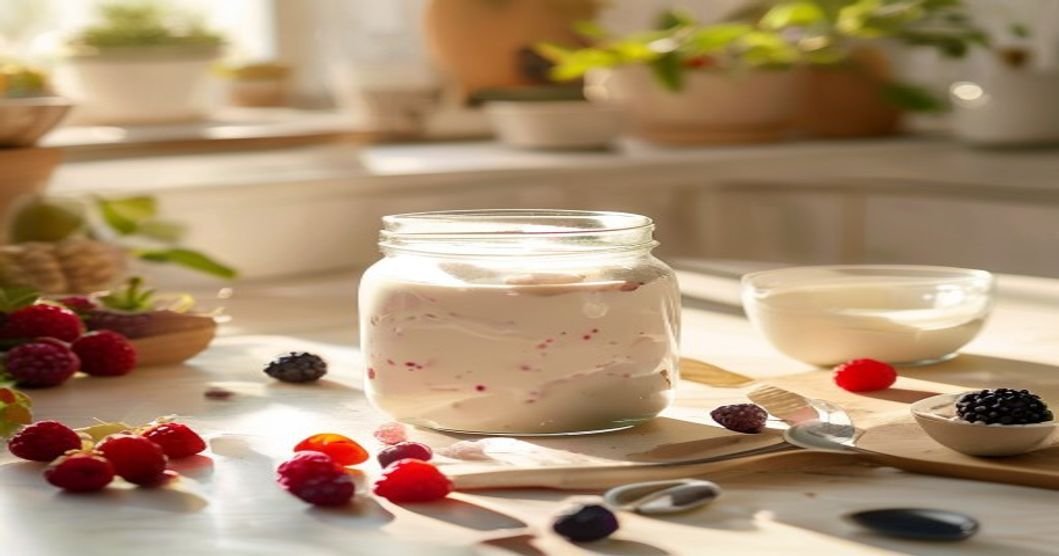
How to Check for Doneness: The yogurt is ready when it has a slightly sour smell, a thick texture (similar to pudding), and a layer of whey (liquid) on top. Stir the whey back into the yogurt before refrigerating.

Step 4: Thicken (Optional)
If your yogurt is too thin, you can thicken it further by:
- Straining it through a cheesecloth or fine-mesh sieve for 1-2 hours to remove excess whey.
- Adding a thickener like chia seeds, agar-agar, or cornstarch (whisk 1 teaspoon into a little cold milk, then stir into the yogurt).
- Chilling it in the fridge for a few hours, which can help it set further.
Step 5: Flavor and Store
Once your yogurt has reached the desired consistency, stir in any flavorings you like:
- Sweet Options: Maple syrup, agave, vanilla extract, fruit preserves, or fresh fruit.
- Savory Options: Salt, pepper, garlic powder, or fresh herbs.
- Toppings: Granola, nuts, coconut flakes, or seeds.
Transfer the yogurt to an airtight container and refrigerate for at least 4 hours to halt the fermentation process and allow the flavors to meld. Homemade vegan yogurt will keep in the fridge for 5-7 days.

Troubleshooting Common Issues
Even with the simplest methods, sometimes things don’t go as planned. Here’s how to troubleshoot common problems:
My Yogurt Didn’t Thicken
- Cause: The milk wasn’t heated to 180°F (82°C) before cooling, or the starter culture wasn’t potent enough.
- Fix: Heat the milk again to 180°F (82°C), cool it properly, and use a fresh starter culture. Consider adding a thickener like agar-agar next time.
My Yogurt is Too Tangy
- Cause: It fermented for too long (over 24 hours).
- Fix: Shorten the fermentation time next batch. For milder tang, ferment for 8-12 hours.