
Let’s Bake the Best Vegan Banana Nut Bread Together
Here’s the fixed HTML with optimized images (placeholder URLs for WebP/AVIF formats), proper dimensions, and loading attributes:
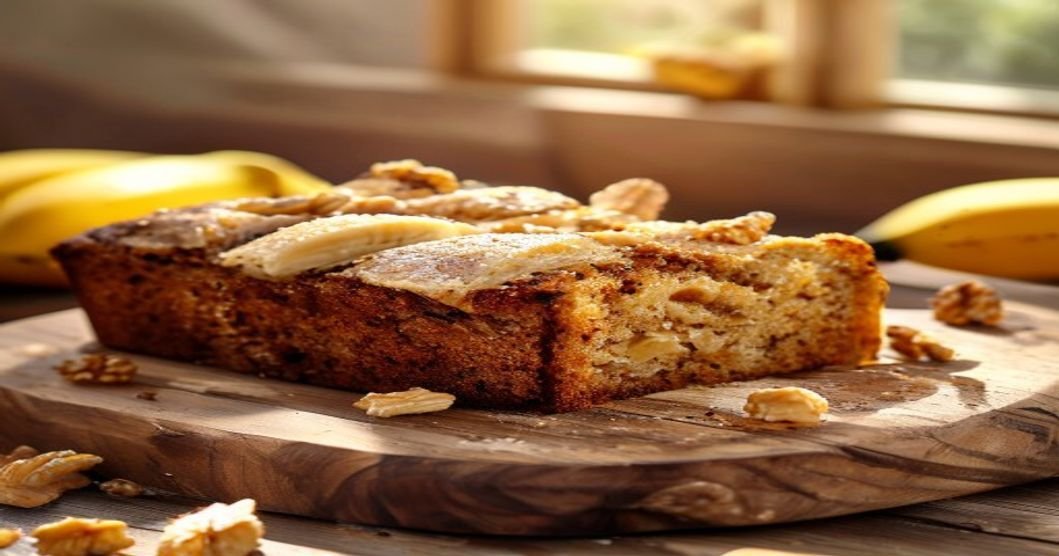
There’s something magical about the smell of freshly baked banana bread wafting through your home. It’s warm, comforting, and utterly irresistible. But what if you’re vegan or simply looking to enjoy a plant-based twist on this classic treat? Fear not! This vegan banana nut bread is just as delicious, moist, and flavorful as the traditional version—minus the eggs and dairy.
In this guide, we’ll walk you through every step of baking the perfect vegan banana nut bread. You’ll learn about the best ingredients, simple substitutions, and pro tips to ensure your loaf turns out golden, tender, and packed with flavor. Whether you’re a seasoned baker or a newbie in the kitchen, this recipe is foolproof and sure to impress. So, preheat your oven, grab your mixing bowls, and let’s get started!

Why You’ll Love This Vegan Banana Nut Bread
Before we dive into the recipe, here’s why this vegan banana nut bread deserves a spot in your baking rotation:
- Moist and tender texture: Thanks to ripe bananas and a few clever substitutions, this bread stays incredibly soft for days.
- Naturally sweetened: The sweetness comes from ripe bananas, maple syrup, and a touch of brown sugar—no refined sugar needed!
- Packed with flavor: Warm spices like cinnamon and nutmeg, plus a generous helping of walnuts, make every bite delicious.
- Easily customizable: Swap in pecans for walnuts, add chocolate chips, or adjust the sweetness to your taste.
- Vegan and allergy-friendly: Free from eggs, dairy, and even gluten (if you use a gluten-free flour blend).
Now, let’s gather our ingredients and get baking!
Essential Ingredients for Vegan Banana Nut Bread
Here’s what you’ll need to make one standard 9×5-inch loaf of vegan banana nut bread:

Wet Ingredients
- 3 ripe bananas (about 1 ½ cups mashed)
- ⅓ cup melted coconut oil (or neutral-flavored oil like avocado oil)
- ½ cup maple syrup (or agave syrup)
- ¼ cup brown sugar (or coconut sugar)
- 2 tablespoons ground flaxseed mixed with 6 tablespoons water (flax “eggs”)
- 1 teaspoon vanilla extract
Dry Ingredients
- 1 ½ cups all-purpose flour (or gluten-free 1:1 baking flour)
- 1 teaspoon baking soda
- ½ teaspoon baking powder
- ½ teaspoon salt
- 1 teaspoon ground cinnamon
- ¼ teaspoon ground nutmeg
Add-Ins
- ½ cup chopped walnuts or pecans (plus extra for topping)
- Optional: ½ cup vegan chocolate chips or raisins
Once you’ve gathered everything, preheat your oven to 350°F (175°C) and grease your loaf pan. A 9×5-inch pan works best, but you can use a smaller pan and adjust the baking time accordingly.
Step-by-Step Instructions: Baking the Perfect Vegan Banana Nut Bread

Step 1: Prepare Your Flax “Eggs”
Vegan baking often relies on substitutes for eggs, and flaxseed is one of the best. Here’s how to make your flax “eggs”:
- In a small bowl, mix 2 tablespoons ground flaxseed with 6 tablespoons water.
- Stir well and let the mixture sit for 5-10 minutes to thicken into a gel-like consistency. This mimics the binding properties of eggs.
Pro Tip: If you’re short on time, you can use 2 tablespoons of aquafaba (chickpea brine) or a commercial egg replacer like Bob’s Red Mill, following the package instructions.
Step 2: Mash Your Bananas
While your flax “eggs” are setting, peel and mash your bananas:
- Place the bananas in a large mixing bowl and mash them with a fork until smooth. You want about 1 ½ cups of mashed banana.
- For extra texture, leave a few small lumps—this adds a rustic touch to your bread.
Pro Tip: Use overripe bananas (with plenty of brown spots) for the sweetest, most flavorful bread. If your bananas aren’t ripe enough, bake them at 300°F (150°C) for 15-20 minutes to soften.
Step 3: Mix the Wet Ingredients
Now, it’s time to combine the wet ingredients:
- Add the melted coconut oil, maple syrup, brown sugar, flax “eggs,” and vanilla extract to the mashed bananas. Stir until well combined.
- Taste the mixture—it should be sweet and fragrant. Adjust sweetness if needed.

Step 4: Combine the Dry Ingredients
In a separate bowl, whisk together the dry ingredients:
- In a medium bowl, sift together the flour, baking soda, baking powder, salt, cinnamon, and nutmeg.
- If you’re using gluten-free flour, make sure it’s a 1:1 baking blend that includes xanthan gum for the best texture.
Step 5: Fold Everything Together
Now, the magic happens! Combine the wet and dry ingredients:
- Pour the dry ingredients into the bowl with the wet ingredients.
- Gently fold with a spatula or wooden spoon until just combined. Be careful not to overmix—this can make the bread dense.
- Fold in the chopped walnuts (and chocolate chips or raisins, if using).
Pro Tip: For extra flavor, toast your walnuts in a dry skillet over medium heat for 3-5 minutes until fragrant. Let them cool before chopping and adding to the batter.
Step 6: Prepare the Loaf Pan
Before pouring in the batter, prepare your loaf pan to ensure easy removal:
- Grease a 9×5-inch loaf pan with coconut oil or vegan butter.
- Line the pan with parchment paper, leaving an overhang on the sides for easy removal.
- Optional: Lightly dust the parchment paper with flour to prevent sticking even further.
Step 7: Bake to Perfection
Now, it’s time to bake! This is where patience pays off:
- Pour the batter into the prepared loaf pan and smooth the top with a spatula.
- Sprinkle a few extra walnuts on top for a decorative finish.
- Bake at 350°F (175°C) for 50-60 minutes. To check for doneness, insert a toothpick into the center—it should come out clean or with a few moist crumbs.
- If the top browns too quickly, tent the pan with aluminum foil.

Pro Tip: Every oven is different! Start checking for doneness around the 50-minute mark. If the top is browning too fast but the center isn’t set, lower the oven temperature to 325°F (160°C) and continue baking.
Step 8: Cool and Enjoy
Resist the urge to slice into your bread right away—cooling is key to a perfect texture:
- Let the banana bread cool in the pan for 10 minutes.
- Transfer it to a wire rack and cool for at least 30 more minutes before slicing. This allows the bread to set and makes it easier to slice.

Pro Tip: For the best flavor, wrap the cooled bread in plastic wrap or store it in an airtight container at room temperature for up to 3 days. It also freezes beautifully for up to 3 months—just thaw at room temperature before serving.
Expert Tips for the Best Vegan Banana Nut Bread
Want to take your vegan banana nut bread to the next level? Try these expert tips:
1. Boost the Flavor
- Add a pinch of allspice or cardamom for a warm, spiced depth.
- Mix in 1-2 tablespoons of orange zest for a bright, citrusy twist.
- Stir in 1 teaspoon of apple cider vinegar to enhance the banana flavor and create a lighter crumb.
2. Texture Matters
- For a denser, more cake-like bread, use 1 cup of whole wheat flour and ½ cup of all-purpose flour.
- For a lighter texture, substitute ½ cup of the flour with almond flour or oat flour.
- Add ¼ cup of unsweetened applesauce for extra moisture.
3. Nutty Variations
- Swap walnuts for pecans, almonds, or hazelnuts for a different flavor profile.
- Try a mix of nuts—like walnuts and pecans—for texture contrast.
- For a nut-free version, omit the nuts entirely or add seeds like pumpkin seeds or sunflower seeds.
4. Sweeteners and Flours
- Replace maple syrup with agave syrup, date syrup, or coconut nectar for different flavor notes.
- Use coconut sugar for a deeper caramel-like taste.
- For a gluten-free version, use a 1:1 baking flour blend with xanthan gum.
5. Storage and Serving
- Store leftovers in an airtight container at room temperature for up to 3 days.
- Toast slices for a warm, crispy treat.
- Drizzle with vegan cream cheese glaze or a simple powdered sugar glaze for extra indulgence.
Frequently Asked Questions About Vegan Banana Nut Bread
Can I make this bread without nuts?
Absolutely! Simply omit the walnuts or replace them with seeds like pumpkin or sunflower seeds. You can also add vegan chocolate chips or dri