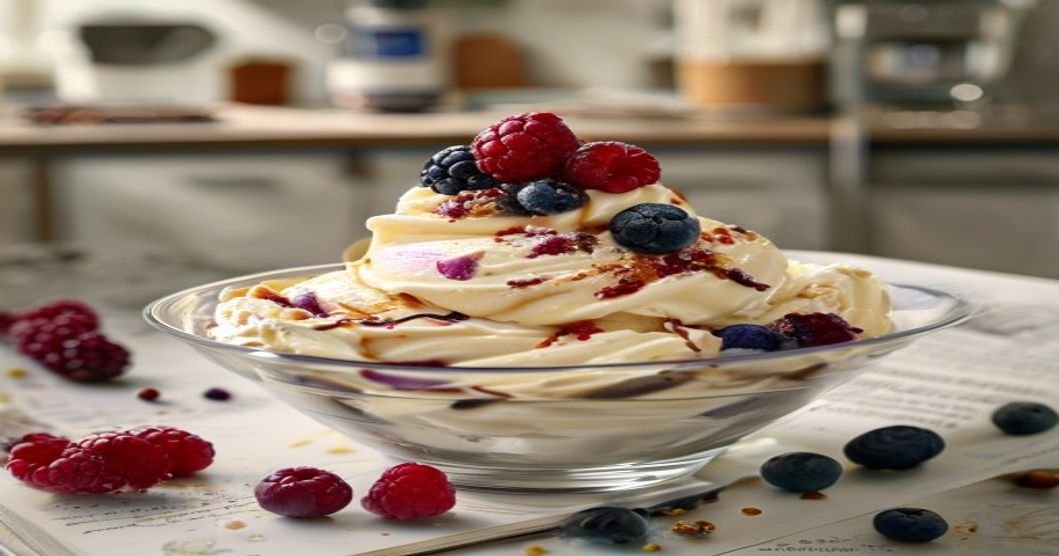
Protein Ice Cream at Home: The Ultimate No-Churn, No-Machine Guide
It was a sweltering summer afternoon when I decided to tackle the one kitchen challenge that had been haunting me for years: making protein ice cream at home—without an ice cream maker. I had tried store-bought protein bars, shaky store-bought “healthy” ice creams, and even that one disastrous attempt at blending frozen bananas into something resembling soft-serve (spoiler: it tasted like banana cement).
But this time, I wasn’t just aiming for edible. I wanted creamy, dreamy, high-protein ice cream that tasted like the real deal—something my fitness-obsessed friends wouldn’t turn their noses up at, and something my kids would actually ask for seconds of. And after a few kitchen experiments (and a couple of melted disasters), I cracked the code.
Now, I’m sharing my foolproof method with you. No ice cream maker? No problem. No fancy ingredients? Not an issue. Just rich, satisfying, homemade protein ice cream that’s ready in minutes and packed with muscle-friendly nutrients.
Why Make Protein Ice Cream at Home?
Let’s be honest—store-bought protein ice cream can be hit or miss. Some brands are chalky, overly sweet, or packed with artificial junk. Others cost an arm and a leg. Making your own gives you complete control over taste, texture, and nutrition. Plus, it’s:
- Budget-friendly: A batch costs pennies compared to premium brands.
- Customizable: Swap flavors, add mix-ins, adjust sweetness—it’s all up to you.
- Protein-packed: Add your favorite protein powder for a post-workout treat.
- No artificial junk: Skip the gums, stabilizers, and mystery ingredients.
- Quick & easy: Ready in under 10 minutes (plus freezing time).
And the best part? You end up with something that actually tastes like real ice cream—creamy, smooth, and indulgent—without the guilt.
The Secret to Creamy No-Churn Protein Ice Cream
The key to creamy, scoopable protein ice cream without a machine lies in three things:
- Choosing the right base
- Using the right protein powder
- Mastering the freezing technique
Let’s break it down.
1. Pick Your Base (No Banana Required!)
While frozen bananas are a popular base for healthy “nice cream,” they can be too icy or overly sweet for protein ice cream. Instead, try these alternatives for a smoother, more stable texture:
- Greek yogurt: Full-fat or 2% works best for creaminess. Plain or vanilla-flavored yogurt adds tang without overpowering.
- Cottage cheese: Blended until smooth, it adds protein and a neutral flavor. Trust me—you won’t taste the curds!
- Silken tofu: A vegan-friendly option that’s naturally creamy and high in protein.
- Coconut milk (full-fat): For a dairy-free version, but expect a slightly coconutty taste.
- Avocado: Adds healthy fats and a velvety texture (pair with cocoa for chocolate “ice cream”).
My personal favorite? A mix of Greek yogurt and cottage cheese—it’s like the dynamic duo of creaminess.
2. Choose the Right Protein Powder
Not all protein powders are created equal when it comes to ice cream. Avoid:
- Gritty or chalky powders (especially casein or some plant-based blends).
- Overly sweetened powders (they can make your ice cream taste like dessert gone wrong).
- Unflavored powders (unless you’re masking them with strong flavors like peanut butter or chocolate).
Stick to:
- Whey protein isolate (smooth and neutral).
- Vanilla or unflavored whey (easy to blend into any flavor).
- Plant-based protein (pea + rice blend) if you’re dairy-free (look for a smooth texture).
Pro tip: If your protein powder is grainy, blend it with a splash of milk or yogurt first to smooth it out before adding it to your base.
3. The Freezing Trick That Prevents Icy Texture
This is where most homemade attempts fail. Ice crystals are the enemy of creamy protein ice cream. To combat them:
- Use a shallow container (like a loaf pan or pie dish) to freeze. This increases surface area and speeds up freezing.
- Stir every 30–60 minutes for the first 2–3 hours. This breaks up ice crystals and keeps the texture smooth.
- Add a little alcohol (optional): A teaspoon of vodka or rum lowers the freezing point and keeps things softer. (Don’t worry—you won’t taste it!)
- Let it sit at room temp for 5 minutes before scooping. This softens the edges just enough.
Follow these steps, and you’ll get ice cream that’s scoopable, creamy, and satisfying—not a frozen brick.
5 Delicious Protein Ice Cream Recipes (No Machine Needed)
Ready to get started? Here are five foolproof recipes to try. Each serves 2–4 people, depending on portion size.
1. Classic Vanilla Protein Ice Cream
Ingredients:
- 1 cup plain Greek yogurt (full-fat)
- ½ cup cottage cheese
- 2 scoops vanilla whey protein powder
- 2–3 tbsp milk (or almond milk), as needed
- 1 tsp vanilla extract
- 1–2 tbsp honey or maple syrup (optional, for sweetness)
- Pinch of salt
Instructions:
- Blend all ingredients in a food processor or high-speed blender until completely smooth (about 1–2 minutes).
- Pour into a shallow container and freeze.
- Stir every 30–60 minutes for the first 3 hours to prevent ice crystals.
- Serve after 4–6 hours, or let sit at room temp for 5 minutes before scooping.
Flavor boost: Add 1 tbsp cocoa powder for chocolate vanilla swirl, or fold in ¼ cup mini chocolate chips after the first stir.
2. Chocolate Peanut Butter Protein Ice Cream
Ingredients:
- 1 cup plain Greek yogurt
- ½ cup silken tofu (or cottage cheese)
- 2 scoops chocolate whey protein
- 2 tbsp peanut butter (natural, unsweetened)
- 1 tbsp cocoa powder
- 1–2 tbsp milk, as needed
- 1 tsp vanilla extract
- 1–2 tbsp honey or sugar-free syrup (optional)
Instructions:
- Blend all ingredients until smooth.
- Pour into a container and freeze, stirring every 30–60 minutes.
- After 2 hours, fold in 2 tbsp chopped peanut butter cups or mini peanut butter chips.
- Let freeze completely (4–6 hours).
Pro tip: For extra richness, swirl in 1 tbsp melted peanut butter after the first stir.
3. Berry Blast Protein Ice Cream (Vegan Option)
Ingredients:
- 1 cup frozen mixed berries (strawberries, blueberries, raspberries)
- 1 cup coconut milk (full-fat, canned)
- 2 scoops vanilla plant-based protein powder
- 1 tbsp chia seeds (optional, for thickness)
- 1–2 tbsp maple syrup or agave (adjust to taste)
- 1 tsp lemon juice (brightens flavor)
Instructions:
- Blend frozen berries and coconut milk first to break them up.
- Add protein powder, chia seeds, sweetener, and lemon juice. Blend until smooth.
- Pour into a container and freeze, stirring every 30 minutes for the first 2 hours to break up ice.
- After 4 hours, it’s ready to eat!
Flavor variation: Swap berries for mango or pineapple for a tropical twist.
4. Coffee Mocha Protein Ice Cream
Ingredients:
- 1 cup Greek yogurt
- ½ cup cottage cheese
- 1–2 scoops chocolate or vanilla protein powder
- 1 tbsp instant coffee granules (or ½ cup cold brew concentrate)
- 1 tbsp cocoa powder
- 1–2 tbsp milk, as needed
- 1 tsp vanilla extract
- 1–2 tbsp sugar-free chocolate syrup (optional)
Instructions:
- Dissolve coffee granules in 1 tbsp hot water, then cool.
- Blend all ingredients until smooth.
- Freeze, stirring every 30 minutes for the first 3 hours.
- After 4 hours, drizzle with sugar-free chocolate syrup before serving.
Caffeine boost: Add 1 shot of espresso to the mix for extra intensity.
5. Cookies & Cream Protein Ice Cream
Ingredients:
- 1 cup Greek yogurt
- ½ cup cottage cheese
- 2 scoops vanilla or unflavored protein powder
- ½ tsp vanilla extract
- 4–6 crushed Oreo thins (or sugar-free cookies)
- 1–2 tbsp milk, as needed
- 1 tbsp cocoa powder (optional, for depth)
Instructions:
- Blend yogurt, cottage cheese, protein powder, and vanilla until smooth.
- Fold in ⅓ of the crushed cookies.
- Freeze, stirring every 30 minutes for the first 2 hours.
- After 2 hours, add the remaining crushed cookies on top, pressing lightly into the surface.
- Let freeze completely (4–6 hours).
Healthier swap: Use homemade almond flour cookies sweetened with stevia for a lower-sugar version.
Pro Tips for the Best Protein Ice Cream Every Time
Want to take your protein ice cream to the next level? Keep these tips in mind:
1. Texture Troubleshooting
- Too icy? Blend in 1 tbsp cream cheese or a splash of heavy cream. These fats help lower the freezing point.
- Too soft? Freeze longer (up to 8 hours) or add 1 tsp xanthan gum (a natural thickener) to stabilize.
- Grainy? Your protein powder may not be blending smoothly. Try dissolving it in a little warm milk first.
2. Flavor Hacks
- Boost sweetness naturally: Add a pinch of cinnamon, a splash of vanilla, or a few drops of liquid stevia.
- Make it indulgent: Top with sugar-free caramel sauce, crushed nuts, or fresh fruit.
- Spice it up: A pinch of cinnamon, nutmeg, or cardamom adds warmth to vanilla or chocolate flavors.
3. Storage & Meal Prep
- Keep it fresh: Store in an airtight container for up to 2 weeks. Press plastic wrap directly on the surface to prevent ice crystals.
- Portion ahead: Scoop into individual servings and freeze for grab-and-go snacks.
- Re-blend if needed: If it freezes too hard, let it sit at room temp for 10 minutes, then blend briefly to restore creaminess.
Why This Recipe Works for Everyone
Whether you’re a bodybuilder, a busy parent, or just someone who loves ice cream but wants to eat healthier, this method is a game-changer. It’s:
- High-protein (20–30g per serving, depending on the recipe).
- Low in sugar (no refined sugar, unless you add it).
- Customizable for dietary needs (vegan, dairy-free, keto-friendly with swaps).
- Kid-approved (hide the protein powder in chocolate flavors!).
- Stress-free (no machine, no fuss).
And the best part? You’ll never go back to sad, store-bought protein bars or overpriced “health” ice creams again.
Your Turn: Make Protein Ice Cream Tonight!
Ready to ditch the ice cream maker and the grocery store aisles? Here’s your action plan:
- Pick a recipe from above (or mix and match ingredients!).
- Gather your base (yogurt, cottage cheese, tofu, etc.) and protein powder.
- Blend & freeze using the stirring method to avoid ice crystals.
- Top & enjoy with your favorite mix-ins or sauces.
- Share the love—tag us on social media with your creations! (#ProteinIceCreamMagic)
Remember, the first batch might not be perfect—and that’s okay! Tweak the sweetness, adjust the base, and find your favorite combo. Once you nail it, you’ll have a healthy, high-protein dessert that tastes like a cheat meal but fuels your goals.
So go ahead—grab that blender, pick your flavors, and make magic happen. Your taste buds (and your macros) will thank you.
Frequently Asked Questions
Do I need an ice cream maker for protein ice cream?
Nope! With the right base and stirring technique, you can achieve creamy texture without a machine. An ice cream maker speeds up the process but isn’t necessary.
Can I use plant-based protein powder?
Absolutely! Just choose a smooth, finely milled blend (pea + rice protein works well). Avoid gritty or overly sweetened vegan powders.
How do I prevent my protein ice cream from tasting chalky?
Use a high-quality protein powder, blend it well with liquid, and avoid over-sweetening. Adding a fat source (like peanut butter or yogurt) also helps mask any aftertaste.
Can I make this keto-friendly?
Yes! Swap the yogurt for coconut milk, skip the honey, and use a keto-friendly protein powder. Add a little erythritol or monk fruit sweetener to taste.
How long does homemade protein ice cream last?
Stored in an airtight container, it’ll last 1–2 weeks in the freezer. For best texture, consume within the first week.
Final Thoughts: The Best Protein Ice Cream Starts in Your Kitchen
There’s something empowering about making your own ice cream. No more reading labels, no more settling for mediocre “healthy” treats, and no more waiting for a machine to do the work. With a blender, a freezer, and a little patience, you can whip up a batch of protein-packed, crave-worthy ice cream in minutes.
So the next time a sweet tooth strikes—or you need a post-workout reward—skip the store and head to your kitchen. Your body (and your wallet) will thank you.
Now, go blend, freeze, and enjoy the creamiest protein ice cream you’ve ever tasted—no machine required.
What’s your favorite protein ice cream flavor? Share your creations in the comments below—or tag us on Instagram for a chance to be featured!
P.S. Want more high-protein dessert ideas? Check out our guide to 5-Minute Protein Mug Cakes next!
Related reading
- 15g Protein Smoothies You Can Make in 5 Minutes
- The “Busy Morning” Vegan Protein Shake That Actually Tastes Good
- No-Bake Peanut Butter Protein Breakfast Bars