
The Secret to Restaurant-Style White Chicken Chili at Home
Discover the secrets to making creamy, restaurant-style white chicken chili at home with simple ingredients and pro techniques. Perfect for chilly nights!
There’s something magical about a steaming bowl of white chicken chili. Creamy, hearty, and packed with flavor, it’s the ultimate comfort food—especially on chilly evenings. But what if we told you that you don’t need to visit a restaurant to enjoy this dish? With the right techniques and ingredients, you can recreate that rich, restaurant-style white chicken chili in your own kitchen.
In this guide, we’ll uncover the secrets behind making the best white chicken chili at home. From choosing the right ingredients to mastering the cooking process, you’ll learn how to elevate this dish from good to unforgettable. Plus, we’ll share pro tips to ensure your chili is always a hit with family and friends. Ready to get started? Jump to the recipe now.
Why White Chicken Chili Stands Out
White chicken chili is a beloved twist on traditional chili, offering a lighter yet equally satisfying alternative. Unlike its beefy, tomato-based counterpart, white chicken chili relies on tender chicken, white beans, and a creamy broth infused with green chiles, spices, and fresh herbs. Here’s why it’s a standout dish:
- Lighter yet filling: The use of chicken and white beans makes this chili less heavy than classic beef chili, but it’s still packed with protein and fiber to keep you full.
- Versatile flavors: The combination of green chiles, cumin, and cilantro creates a bright, zesty profile that’s both comforting and refreshing.
- Quick and easy: Unlike traditional chili, which often requires hours of simmering, white chicken chili can be ready in under an hour—perfect for weeknight dinners.
- Crowd-pleaser: Its mild yet flavorful taste appeals to both adults and kids, making it a go-to dish for gatherings.
The Key Ingredients for Restaurant-Style White Chicken Chili
The secret to restaurant-quality white chicken chili lies in the ingredients. Here’s what you’ll need to achieve that rich, creamy, and flavorful result:
1. Protein: Chicken
Opt for boneless, skinless chicken breasts or thighs. Thighs are more forgiving and stay juicier during cooking, but breasts work well if you prefer a leaner option. For extra depth, consider using a mix of both.
2. Beans: The Creamy Base
White beans are the star of this dish. Great Northern beans or cannellini beans are ideal because they hold their shape while breaking down slightly to thicken the chili. For a shortcut, use canned beans, but if you have time, soak dried beans overnight for a creamier texture.
3. Green Chiles: The Flavor Booster
Green chiles (like diced green chiles or poblano peppers) add a subtle heat and smoky flavor. For convenience, canned diced green chiles work well, but fresh roasted poblanos will take your chili to the next level.
4. Broth: The Foundation
Use high-quality chicken broth as the base. Homemade broth is best, but store-bought low-sodium broth works too. For extra richness, substitute part of the broth with chicken stock or even a splash of heavy cream (added at the end).
5. Spices: The Flavor Profile
The right blend of spices is crucial. Here’s what you’ll need:
- Cumin: Adds earthiness and warmth.
- Oregano: Provides a slightly bitter, herbal note.
- Garlic and onion powder: Builds a savory base.
- Cayenne pepper (optional): For a hint of heat.
6. Creaminess: The Finishing Touch
To achieve that restaurant-style creaminess, stir in a combination of sour cream, cream cheese, or heavy cream at the end. This step is non-negotiable for a velvety, rich texture.
Step-by-Step Recipe: How to Make White Chicken Chili at Home
Now that you know the key ingredients, let’s dive into the step-by-step process. This recipe serves 6-8 people and takes about 45 minutes from start to finish.
Ingredients
- 1.5 lbs boneless, skinless chicken breasts or thighs
- 1 tbsp olive oil
- 1 large onion, diced
- 3 cloves garlic, minced
- 2 cans (15 oz each) Great Northern or cannellini beans, drained and rinsed
- 1 can (4 oz) diced green chiles (or 2 fresh poblano peppers, roasted and diced)
- 4 cups chicken broth (low-sodium preferred)
- 1 tsp ground cumin
- 1 tsp dried oregano
- 1/2 tsp garlic powder
- 1/2 tsp onion powder
- 1/4 tsp cayenne pepper (optional, for heat)
- 1 cup sour cream (or 4 oz cream cheese, softened)
- 1/2 cup heavy cream (optional, for extra richness)
- Salt and black pepper to taste
- Fresh cilantro, chopped (for garnish)
- Shredded Monterey Jack or cheddar cheese (for garnish)
- Lime wedges (for serving)
Instructions
1. Cook the Chicken
Start by seasoning the chicken with salt and pepper. Heat olive oil in a large pot or Dutch oven over medium-high heat. Add the chicken and cook for 5-6 minutes per side until golden brown. Remove the chicken from the pot and set it aside to cool. Once cool enough to handle, shred it using two forks.
2. Sauté the Aromatics
In the same pot, add the diced onion and cook for 3-4 minutes until softened. Add the minced garlic and cook for another 30 seconds until fragrant. Stir in the cumin, oregano, garlic powder, onion powder, and cayenne pepper, cooking for 1 minute to toast the spices.
3. Build the Chili Base
Add the diced green chiles, beans, and chicken broth to the pot. Stir well to combine, then bring the mixture to a simmer. Let it cook for 10 minutes to allow the flavors to meld.
4. Add the Chicken and Simmer
Return the shredded chicken to the pot and stir to incorporate. Reduce the heat to low and let the chili simmer for 15-20 minutes, stirring occasionally. This step ensures the chicken absorbs the flavors of the broth and spices.
5. Add the Creaminess
Reduce the heat to low and stir in the sour cream (or cream cheese) and heavy cream (if using). Be careful not to boil the chili after adding the dairy, as it can cause the mixture to curdle. Simmer for another 5 minutes until the chili is thick and creamy.
6. Season to Taste
Taste the chili and adjust the seasoning with salt and pepper as needed. If you prefer a thinner consistency, add a little more broth. For extra heat, sprinkle in more cayenne pepper or a dash of hot sauce.
7. Serve and Garnish
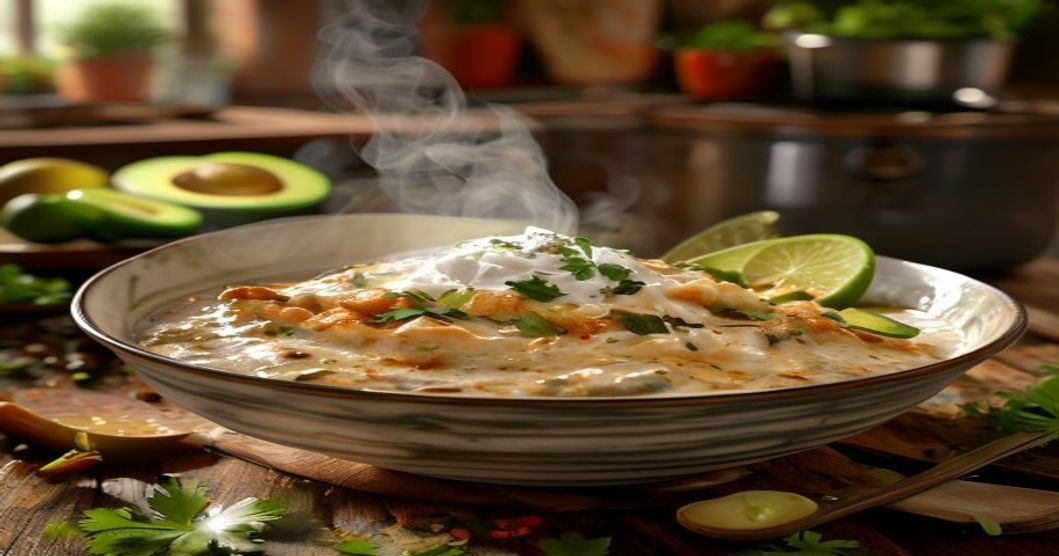
Ladle the chili into bowls and garnish with chopped cilantro, shredded cheese, and a squeeze of lime. Serve with warm tortillas, crusty bread, or cornbread for a complete meal.
Pro Tips for the Best White Chicken Chili
Want to take your white chicken chili to the next level? Here are some expert tips to ensure it’s restaurant-quality every time:
1. Use Homemade Chicken Broth
Store-bought broth is convenient, but homemade broth adds depth of flavor that can’t be beaten. Simmer chicken bones, onions, carrots, celery, and herbs for a few hours to create a rich, flavorful base for your chili.
2. Roast Your Poblanos
If you’re using fresh poblano peppers, roast them before adding them to the chili. Roasting enhances their natural sweetness and adds a smoky depth to the dish. To roast, place whole poblanos on a baking sheet and broil for 5-7 minutes per side until charred. Place them in a bowl, cover with a towel, and let them steam for 10 minutes. Peel, seed, and dice before adding to the chili.
3. Don’t Skip the Dairy
The creaminess of this chili comes from the dairy. If you’re watching your fat intake, you can substitute the sour cream or heavy cream with Greek yogurt or a lighter cream alternative. However, keep in mind that the texture and flavor may vary slightly.
4. Make It Ahead
White chicken chili tastes even better the next day as the flavors continue to meld. Prepare the chili in advance and store it in the refrigerator for up to 3 days. Reheat gently on the stovetop, adding a splash of broth if needed to loosen the consistency.
5. Freeze for Later
This chili freezes beautifully! Portion it into airtight containers and freeze for up to 3 months. Thaw overnight in the refrigerator and reheat on the stovetop or in the microwave. Save this recipe for later.
6. Customize Your Chili
Feel free to customize this recipe to suit your tastes. Add diced bell peppers for extra crunch, swap in black beans for a different flavor, or stir in corn for a touch of sweetness. The possibilities are endless!
Frequently Asked Questions
Can I make this chili in a slow cooker?
Absolutely! After browning the chicken and sautéing the aromatics, transfer everything to your slow cooker. Cook on low for 6-8 hours or on high for 3-4 hours. Stir in the dairy and garnishes just before serving.
Is white chicken chili spicy?
This recipe is mild, but you can easily adjust the heat to your preference. Add more cayenne pepper, diced jalapeños, or a dash of hot sauce to bring the heat.
Can I use ground chicken instead of whole chicken breasts or thighs?
Yes! Ground chicken works well and cooks faster. Brown it in the pot before adding the aromatics and proceed with the recipe as written.
What can I serve with white chicken chili?
This chili pairs well with a variety of sides. Try serving it with warm tortillas, crusty bread, cornbread, or even over rice. A simple green salad or roasted vegetables make great accompaniments.