
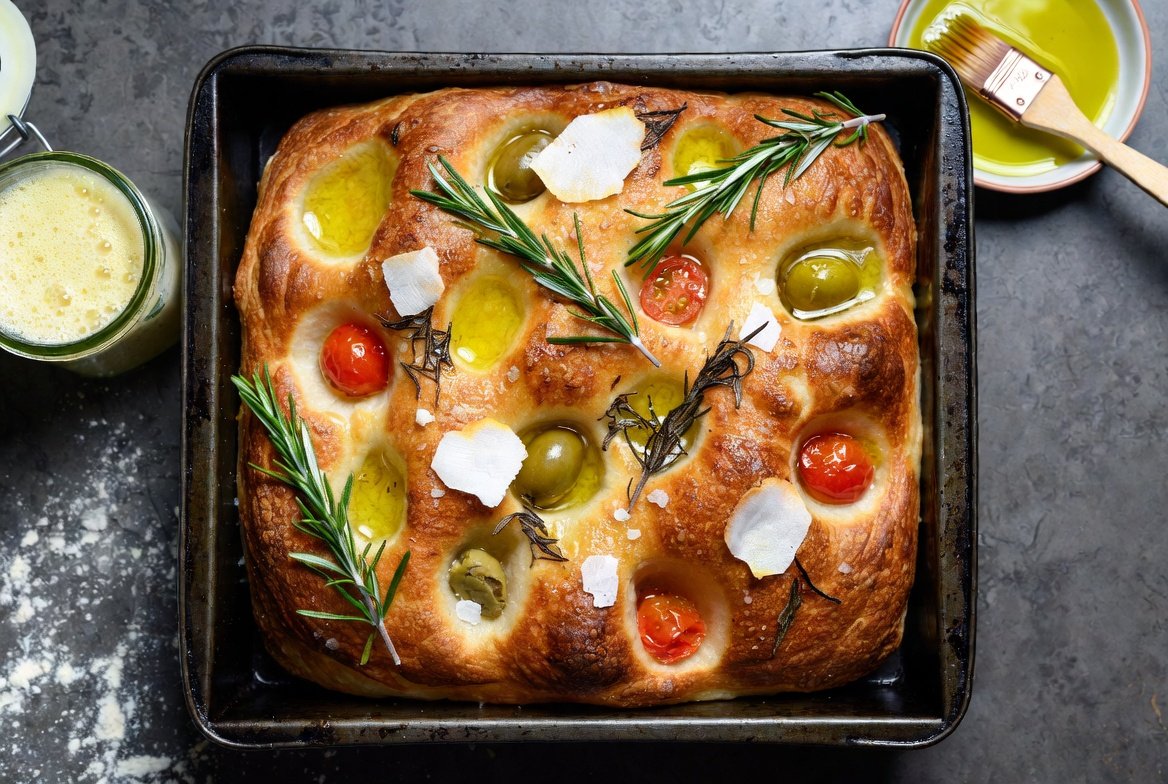
Golden-brown sourdough focaccia with fluffy, airy texture and tangy flavor—perfect for beginners! Drizzled with olive oil and topped with fresh rosemary, this homemade bread is a showstopper that’s easier to make than you think.

Imagine sinking your teeth into a warm, golden-brown slab of focaccia—its surface dimpled and glistening with olive oil, with crisp edges giving way to an unbelievably soft, airy interior. Now, imagine that same focaccia infused with the distinctive, complex tang of a living sourdough starter. Sounds like a dream? It’s not! With this ultimate guide, you’re about to unlock the secrets to crafting the most delightful, easy homemade sourdough focaccia right in your own kitchen.
Whether you’re a seasoned sourdough baker looking for your next conquest or a curious beginner taking your first steps into the world of wild yeast, this comprehensive guide is designed to empower you. We’ll demystify the process, from feeding your starter to achieving that perfect airy crumb, ensuring your journey to fluffy, tangy, and utterly irresistible sourdough focaccia is not just successful, but genuinely enjoyable. Get ready to impress your taste buds—and everyone around you—with a bread that’s surprisingly simple to master.
Why You’ll Love This Sourdough Focaccia Recipe
- Perfectly Fluffy Texture: Achieve that coveted airy crumb with large, irregular holes that make every bite satisfying.
- Rich, Tangy Flavor: The slow fermentation process develops complex, nutty, and subtly tangy notes that commercial yeast can’t match.
- Beginner-Friendly: Despite its artisan appearance, this recipe is designed to be approachable for beginners while still delivering professional results.
- Versatile and Customizable: Top it with your favorite ingredients—rosemary, cherry tomatoes, olives, or even caramelized onions—to make it your own.
Why Sourdough Focaccia? The Magic of Wild Yeast
While traditional focaccia is undeniably delicious, introducing a sourdough starter elevates it to an entirely new level. The magic of sourdough isn’t just a trend; it’s a testament to ancient baking wisdom that offers incredible benefits:
- Unrivaled Flavor Depth: The slow fermentation process carried out by wild yeasts and bacteria in your starter develops a complex range of flavors—subtly tangy, nutty, and savory notes that no commercial yeast can replicate. It’s a flavor profile that speaks of craftsmanship and patience.
- Incredible Texture: Sourdough contributes to a remarkably open, airy, and chewy crumb that is characteristic of premium artisan breads. You’ll get those coveted large, irregular holes that make focaccia so satisfying.
- Improved Digestibility: The fermentation process naturally breaks down some of the complex carbohydrates and gluten in the flour, making sourdough products often easier to digest for many people.
- Enhanced Shelf Life: The acidity produced during fermentation acts as a natural preservative, meaning your sourdough focaccia stays fresh and delicious for longer than its commercial yeast counterparts.
- Natural Leavening: Relying solely on your sourdough starter (levain) means you’re using a completely natural leavening agent, free from commercial additives. It’s baking at its most pure and authentic.
Essential Ingredients for Perfect Sourdough Focaccia
Great bread begins with great ingredients. For your best sourdough focaccia, quality makes a noticeable difference. Here’s what you’ll need:
- Active Sourdough Starter (Levain): This is the heart of your focaccia. Your starter should be bubbly, active, and have recently been fed (peaking at 4-8 hours after feeding). A strong starter ensures good rise and flavor.
- All-Purpose or Bread Flour: You can use good quality unbleached all-purpose flour for a tender crumb, or bread flour for a chewier texture. A mix of both also works beautifully, often yielding the best of both worlds. Look for flours with higher protein content (11-13%) for better gluten development.
- Water: Filtered water is ideal to avoid any chlorine that might inhibit your starter’s activity. The water temperature is crucial—aim for lukewarm (around 90-95°F / 32-35°C) to encourage yeast activity without cooking your starter.
- Fine Sea Salt: Salt is not just for flavor; it also controls fermentation and strengthens the gluten network. Don’t skimp on it, but don’t overdo it either. Fine sea salt dissolves easily and distributes evenly.
- Extra Virgin Olive Oil: A generous amount of good quality olive oil is non-negotiable for focaccia. It contributes to the dough’s texture, preventing sticking, enhancing flavor, and creating that signature crispy, golden crust. Save your best for drizzling.
- Optional Toppings: This is where you can get creative! Flaky sea salt, fresh rosemary, cherry tomatoes, olives, thinly sliced onions, or even a sprinkle of Parmesan cheese are all fantastic additions.
Equipment You’ll Need
You don’t need a professional bakery setup to make incredible focaccia. Here are the basic tools that will make your life easier:
- Large Mixing Bowl: Essential for combining ingredients and performing stretch and folds.
- Digital Kitchen Scale: For precise measurements. Baking, especially sourdough, is a science where accuracy matters.
- 9×13-inch (or similar size) Baking Pan: A standard quarter-sheet pan works wonderfully. Metal pans conduct heat well.
- Plastic Wrap or a Shower Cap: For covering your dough during bulk fermentation and proofing, preventing it from drying out.
- Bench Scraper (optional but helpful): For easily handling sticky dough.
Step-by-Step Instructions for Sourdough Focaccia
Feed Your Starter (The Day Before or Morning Of)
Ensure your sourdough starter is active and ripe. This usually means feeding it 4-8 hours before you plan to mix your dough. It should be bubbly, expanded, and pass the float test (a small spoonful floats in water).
Autolyse (The Initial Mix)
In your large mixing bowl, combine the flour and most of the water (reserve about 50g for later). Mix with your hands or a wooden spoon until no dry bits of flour remain. It will be shaggy. Cover the bowl and let it rest for 30-60 minutes. This “autolyse” step allows the flour to fully hydrate and gluten development to begin naturally, making the dough easier to work with later.
Incorporate Starter and Salt
After the autolyse, add your active sourdough starter to the dough. Using wet hands, gently mix and squeeze the starter into the dough until fully incorporated.
Next, sprinkle the salt over the dough. Slowly drizzle in the reserved water (or most of it) over the salt. The extra water helps dissolve the salt and incorporates it smoothly. Mix well until the salt is fully integrated.
Bulk Fermentation with Stretch and Folds
This is where the magic happens! Bulk fermentation (also known as the first rise) typically lasts 4-6 hours at room temperature (70-75°F / 21-24°C), but can vary greatly depending on your starter’s strength and ambient temperature. During this time, you’ll perform a series of “stretch and folds” to build strength in the dough.
- First set (30 minutes after mixing): With wet hands, grab a portion of the dough from one side, stretch it up, and fold it over the center. Rotate the bowl and repeat this 3-4 times until all sides have been stretched and folded.
- Repeat: Perform 3-4 more sets of stretch and folds, spaced every 30-45 minutes. By the last set, the dough should feel much stronger, smoother, and more elastic.
- Rest: After the last stretch and fold, cover the bowl and let the dough continue to bulk ferment undisturbed until it has increased in volume by about 20-30% and looks gassy and alive. You’ll see small bubbles forming on the surface.
Prepare the Baking Pan and Transfer Dough
Generously drizzle 2-3 tablespoons of olive oil into your chosen baking pan, ensuring the entire bottom and sides are coated. Gently scrape the dough from the mixing bowl into the oiled pan. Try not to deflate it too much. Gently spread the dough to roughly fill the pan, but don’t force it. The oil will help you spread it.
The Second Proof (Cold Fermentation – Recommended)
This step can happen in two ways:
- Room Temperature Proof: For a faster bake the same day, cover the pan with plastic wrap and let it proof at room temperature for 1-2 hours, or until visibly puffy and expanded.
- Cold Fermentation (Recommended): For superior flavor development and convenience, cover the pan tightly with plastic wrap and refrigerate for 12-24 hours. The cold slows fermentation, deepening the tangy flavor and improving the texture. Remove from the fridge 2-3 hours before baking to allow it to come to room temperature and proof further.
Dimpling and Topping
Once your dough is puffy and ready to bake, preheat your oven to 450°F (232°C). Generously drizzle more olive oil (another 2-3 tablespoons) over the surface of the dough. With well-oiled fingers, gently press straight down into the dough, creating those characteristic focaccia dimples. Don’t press all the way to the bottom. Sprinkle with flaky sea salt and your chosen toppings (rosemary, cherry tomatoes, etc.).
Bake Your Sourdough Focaccia
Place the focaccia in the preheated oven. Bake for 20-30 minutes, or until the top is deeply golden brown and the bottom is also nicely browned and crispy. If the top browns too quickly, you can loosely tent it with foil.
Cooling
Once baked, immediately transfer the focaccia from the pan to a wire rack to cool for at least 15-20 minutes. This prevents the bottom from becoming soggy and allows the internal structure to set.
Tips & Tricks for Perfect Sourdough Focaccia