
Ultimate Veggie-Packed Pinwheels for Lunchboxes: Fresh, Fun & Nutritious
Packing a nutritious, kid-friendly lunch doesn’t have to be a daily challenge. With these Ultimate Veggie-Packed Pinwheels, you can turn mealtime into a fun, colorful, and wholesome experience. These pinwheels are perfect for lunchboxes because they’re easy to make, packed with fiber and vitamins, and customizable to your family’s taste.
Whether you’re a busy parent, a health-conscious individual, or a teacher planning a fun snack for students, these pinwheels are a game-changer. They’re also a great way to sneak in extra veggies without fuss. Let’s dive into why these pinwheels are a lunchbox essential and how you can make them in less than 30 minutes.
Why Choose Veggie-Packed Pinwheels for Lunch?
Traditional sandwiches can get soggy or boring, but pinwheels offer a fresh twist. Here’s why they’re a superior lunchbox option:
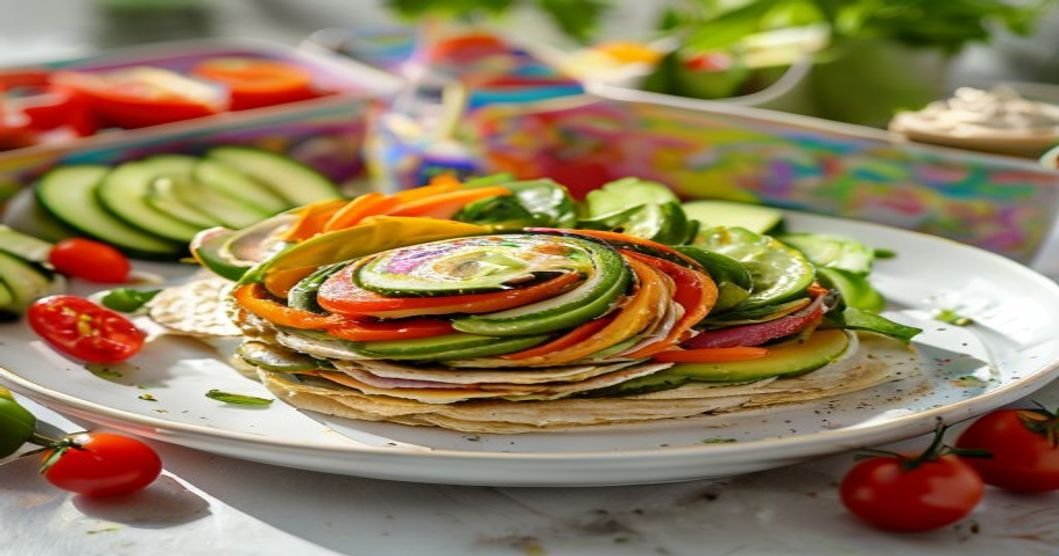
- Nutrient-Dense: Loaded with spinach, bell peppers, carrots, and avocado, these pinwheels provide an excellent source of vitamins A, C, and K, as well as healthy fats.
- Kid-Approved: The colorful layers and fun spiral shape make them visually appealing to children, encouraging them to eat their veggies.
- Customizable: Swap ingredients based on dietary preferences or seasonal produce. Vegetarian? Use hummus or cream cheese. Gluten-free? Opt for a gluten-free tortilla.
- Portable & Mess-Free: Unlike loose veggies or sandwiches, pinwheels stay intact, making them easy to pack and eat on the go.
- Meal Prep Friendly: Make a batch on Sunday and store them in the fridge for up to 3 days. They’re just as delicious cold as they are at room temperature.
Plus, pinwheels are a fantastic way to reduce food waste. Use leftover veggies from last night’s dinner to create these vibrant rolls!
Essential Ingredients for the Perfect Pinwheel
Before we dive into the recipe, let’s go over the key ingredients you’ll need. The beauty of pinwheels is their flexibility, but starting with a solid base ensures the best texture and flavor.
Base Ingredients:
- Tortillas: Use large, soft flour or whole wheat tortillas for the best flexibility. For gluten-free or low-carb options, try spinach or cauliflower tortillas.
- Spread: A thin layer of cream cheese, hummus, pesto, or avocado mash acts as the “glue” to hold the fillings in place.
- Veggies: The more colorful, the better! Aim for a mix of raw and lightly sautéed veggies like spinach, shredded carrots, bell peppers, cucumber, and avocado.
- Protein (Optional): Add grilled chicken, turkey slices, smoked salmon, or tofu for extra protein.
- Cheese (Optional): Mild cheeses like mozzarella, cheddar, or feta melt beautifully and add a creamy texture.
- Herbs & Seasonings: Fresh basil, cilantro, or parsley, along with a pinch of garlic powder, salt, and pepper, elevate the flavor.
Recommended Veggie Combinations:
- Mediterranean Twist: Spinach, roasted red peppers, feta, olives, and a layer of hummus.
- Southwest Style: Black beans, corn, bell peppers, avocado, and a dollop of Greek yogurt.
- Italian Flavors: Pesto, sun-dried tomatoes, fresh mozzarella, and basil.
- Asian-Inspired: Shredded cabbage, carrots, cucumber, and a spread of peanut butter or sesame-ginger sauce.
Pro tip: Slice your veggies thinly for even layers and easier rolling. If using raw veggies like cucumber or bell peppers, pat them dry to prevent excess moisture from making the tortilla soggy.
Step-by-Step Recipe: Veggie-Packed Pinwheels
Now, let’s get to the fun part—making these pinwheels! Follow these simple steps for a foolproof result every time.
What You’ll Need:
- 1 large tortilla (or 2 small ones)
- 2-3 tbsp spread of choice (cream cheese, hummus, etc.)
- 1 cup finely chopped veggies (spinach, carrots, bell peppers, etc.)
- ½ cup protein of choice (optional)
- ¼ cup shredded cheese (optional)
- 1 tsp herbs or seasoning
- Plastic wrap or parchment paper
Instructions:
Step 1: Prep the Tortilla
Lay your tortilla flat on a clean surface. If using a large tortilla, trim the edges to create a neat rectangle for easier rolling. Lightly toast the tortilla for 10-15 seconds in a dry pan to make it more pliable.
Step 2: Spread the Base
Evenly spread your chosen base (cream cheese, hummus, etc.) over the tortilla, leaving a ½-inch border around the edges. This border helps seal the pinwheel when rolled.
Step 3: Layer the Fillings
Start by sprinkling your veggies in an even layer across the tortilla. Add your protein and cheese, if using. Drizzle lightly with olive oil or a dressing of your choice for extra flavor.
Step 4: Roll Tightly
Gently lift the edge of the tortilla closest to you and begin rolling tightly, keeping the fillings snug. Use your fingers to hold the filling in place as you roll. Don’t overstuff—the goal is a compact roll.
Step 5: Secure the Pinwheel
Once rolled, wrap the pinwheel tightly in plastic wrap or parchment paper. Place it seam-side down in the fridge for at least 30 minutes to firm up. This step is crucial—it prevents the pinwheel from unraveling when sliced.
Step 6: Slice and Serve
After chilling, use a sharp knife to slice the pinwheel into 1-inch rounds. For a cleaner cut, dip the knife in warm water before slicing. Arrange the pinwheels on a plate or pack them directly into lunchboxes.
Pro tip: If packing for lunch, place a small piece of parchment paper between the pinwheels to prevent sticking.
Creative Variations to Keep It Exciting
The best part of pinwheels is their versatility. Here are some creative variations to keep lunches interesting all week long:
Sweet & Savory Options:
- Apple & Cheddar: Spread cream cheese on a tortilla, layer with thin apple slices, cheddar cheese, and a sprinkle of cinnamon.
- PB&J: Swap the spread for peanut butter or almond butter, then layer with sliced strawberries or banana and a drizzle of honey.
Protein-Packed Pinwheels:
- Buffalo Chicken: Mix shredded chicken with buffalo sauce, cream cheese, and shredded carrots. Roll up and slice.
- Turkey & Avocado: Layer turkey slices, avocado, spinach, and a smear of hummus for a protein-rich option.
Global Flavors:
- Greek-Inspired: Hummus, cucumber, olives, feta, and red onion.
- Mexican Fiesta: Black beans, corn, avocado, salsa, and a sprinkle of cheese.
- Japanese-Inspired: Cream cheese, smoked salmon, cucumber, and a drizzle of soy sauce.
Don’t be afraid to experiment! Encourage your kids to help choose the fillings—they’ll be more excited to eat their creations.
Tips for Perfect Pinwheels Every Time
Even the best recipes can go awry if a few key details are overlooked. Here are our top tips to ensure your pinwheels are always a hit:
Preventing Soggy Pinwheels:
- Pat dry any wet veggies (like cucumber or tomatoes) before layering.
- Avoid overloading the tortilla with too many juicy ingredients, such as fresh tomatoes.
- Use a thin layer of spread to act as a barrier between the tortilla and the fillings.
Rolling Like a Pro:
- Roll tightly but not too tight—overstuffing can cause the pinwheel to burst open.
- Chill the rolled pinwheel for at least 30 minutes before slicing to firm up the layers.
- Use a serrated knife for cleaner cuts, especially with thicker fillings.
Storage & Meal Prep:
- Fridge: Store pinwheels in an airtight container for up to 3 days. Wrap individually to prevent sticking.
- Freezer: Freeze pinwheels for up to 1 month. Thaw overnight in the fridge before serving. Freezing works best with dry fillings like turkey or chicken.
- Packing: Pack pinwheels in a bento box or compartmentalized container with a small side of dip (like ranch or hummus) for dipping.
Allergy-Friendly Adjustments:
- Dairy-Free: Use dairy-free cream cheese or hummus as the base.
- Gluten-Free: Opt for gluten-free tortillas made from rice, corn, or almond flour.
- Nut-Free: Skip nut butters and use sunflower seed butter or cream cheese instead.
With these tips, you’ll avoid common pitfalls and create pinwheels that are both delicious and visually appealing.
Why Parents and Kids Love These Pinwheels
Parents and children alike rave about these veggie-packed pinwheels. Here’s why they’re a lunchtime favorite:
For Parents:
- Quick & Easy: With minimal prep time, these pinwheels are perfect for busy mornings.
- Nutritious: Packed with veggies and protein, they’re a balanced meal that fuels growing bodies.
- Budget-Friendly: Use seasonal or leftover veggies to save money and reduce waste.
- Versatile: Adapt the recipe to fit dietary restrictions or picky eaters.
For Kids:
- Fun Presentation: The spiral design and colorful layers make eating exciting.
- Dippable: Kids love dipping pinwheels in sauces like ranch, ketchup, or yogurt.
- Customizable: Let them choose their favorite fillings for a sense of ownership over their lunch.
- Portable: Easy to eat at the lunch table, picnic, or even on a field trip.
Many parents have shared stories of their kids gobbling up these pinwheels when they’ve previously refused plain veggies. The key? Making healthy eating fun!
Frequently Asked Questions
Can I use lettuce instead of a tortilla?
While lettuce leaves can work for a low-carb option, they’re less sturdy and may tear when rolling. Use large, sturdy leaves like romaine or butter lettuce, and layer thinly to prevent sogginess.
How do I prevent the pinwheels from unraveling?
The secret is in the rolling and chilling process. Roll tightly, then wrap the pinwheel in plastic wrap and refrigerate for at least 30 minutes before slicing. This helps the layers set and keeps everything in place.
Can I make pinwheels ahead of time?
Absolutely! Pinwheels can be made 1-2 days in advance. Store them in the fridge, wrapped tightly in plastic or parchment paper. Freezing is also an option for longer storage.