
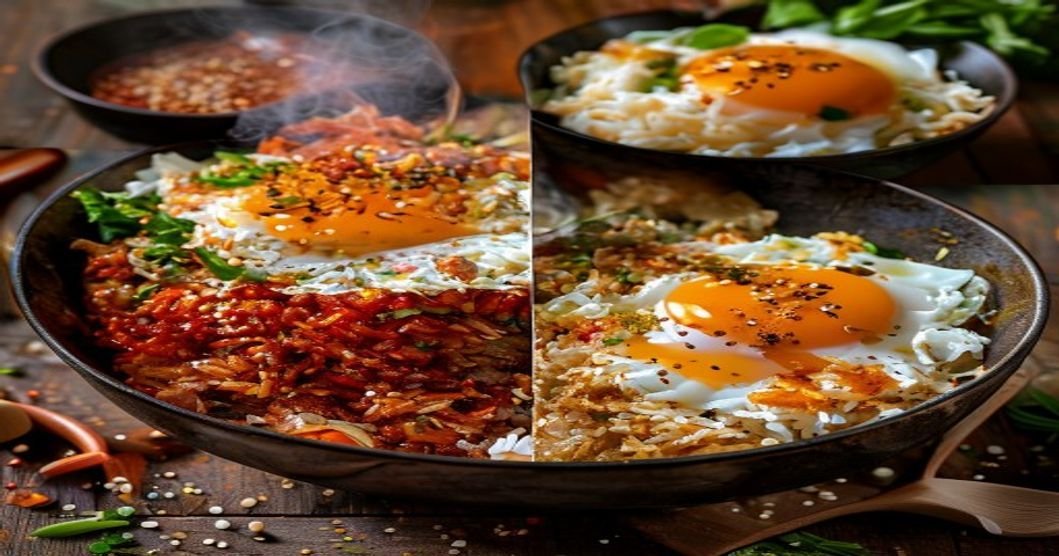
Homemade Kimchi Fried Rice: A Spicy, Savory Story in Every Bite
There’s something magical about the way a sizzling pan can transform humble ingredients into a dish that feels like a warm hug. For me, homemade kimchi fried rice is one of those dishes—a simple yet deeply satisfying meal that tells a story of tradition, comfort, and a little bit of kitchen magic. It’s the kind of recipe that turns leftover rice into a flavor explosion, where tangy kimchi meets crispy edges, and every bite feels like a celebration.
I first fell in love with kimchi fried rice during a rainy afternoon in Seoul, where the scent of garlic and chili paste wafted from a tiny alleyway eatery. The owner, a grandmother with hands as skilled as they were quick, tossed together rice, kimchi, and a handful of simple ingredients until the air was thick with aroma. I took one bite and was hooked. Since then, I’ve recreated that moment in my own kitchen, tweaking the recipe until it matched that memory.
This isn’t just a recipe—it’s a journey. And today, I’m inviting you to join me in making homemade kimchi fried rice that’s crispy, spicy, and utterly irresistible. Whether you’re a kimchi newbie or a seasoned pro, this guide will walk you through every step, from selecting the right ingredients to achieving that perfect golden crust. Let’s get started.
Why This Recipe Works (And Why You’ll Love It)
Before we dive into the steps, let’s talk about why this dish is a winner. First, it’s incredibly versatile. You can make it with leftover rice, fresh rice, or even rice from the takeout container you’ve been saving in the fridge (no judgment here). It’s also budget-friendly, using pantry staples and whatever proteins or veggies you have on hand.
But the real magic lies in the kimchi. Fermented to perfection, kimchi adds a tangy, spicy depth that balances the richness of the fried rice. And when you cook it down, it caramelizes slightly, adding a natural sweetness that rounds out the dish. Plus, it’s packed with probiotics, making this comfort food a little bit healthier than your average takeout.
Here’s what you can expect from this recipe:
- Crispy, golden edges from cooking the rice in a hot, well-oiled pan.
- A harmonious blend of flavors—spicy, tangy, savory, and umami.
- Endless customization options, from protein swaps to veggie additions.
- A satisfying meal that’s ready in under 30 minutes.
Ready to bring the flavors of Korea into your kitchen? Let’s roll up our sleeves and get cooking.
The Ultimate Homemade Kimchi Fried Rice Recipe
Ingredients You’ll Need
This recipe serves 2–3 people, but you can easily double it for a crowd. Here’s what you’ll need:
- 3 cups cooked rice (day-old or chilled rice works best—fresh rice can turn mushy)
- 1 cup kimchi (plus 2–3 tablespoons of kimchi juice for extra tang)
- 2–3 tablespoons gochujang (Korean red pepper paste) (adjust to taste)
- 2 tablespoons soy sauce (or tamari for gluten-free)
- 1 tablespoon sesame oil
- 2 cloves garlic, minced
- 1 small onion, finely diced
- 2 green onions, sliced (for garnish)
- 2 eggs (optional, but highly recommended)
- 1–2 cups protein of choice (see customization tips below)
- 1–2 tablespoons neutral oil (like vegetable or canola oil)
- Salt and pepper to taste
- Toasted sesame seeds (for garnish)
Step-by-Step Instructions
Step 1: Prep Your Ingredients
Before you start cooking, it’s crucial to have everything ready. Kimchi fried rice comes together quickly, so mis en place (having everything chopped and measured) is key. Here’s what to do:
- Chop your veggies: Dice the onion and mince the garlic. Slice the green onions and set aside.
- Prep your protein: If using meat (like pork, beef, or shrimp), slice it thinly so it cooks quickly. For tofu, press it first to remove excess water, then cube it.
- Crack the eggs: If you’re adding eggs, crack them into a bowl and lightly beat them with a fork. Set aside.
- Measure your sauces: Have your gochujang, soy sauce, and sesame oil ready to go.
Pro tip: If your kimchi is very watery, you can squeeze out some of the liquid to prevent the fried rice from becoming soggy. But don’t discard it! That liquid is liquid gold for flavor.
Step 2: Cook Your Protein (If Using)
Heat a large skillet or wok over medium-high heat. Add 1 tablespoon of neutral oil and swirl to coat the pan. Add your protein (e.g., sliced pork, beef, or shrimp) and cook until no longer pink, about 3–4 minutes. Season lightly with salt and pepper, then transfer the protein to a plate and set aside.
In the same pan, add another tablespoon of oil if needed. Toss in the diced onion and minced garlic, cooking until fragrant and the onion is translucent, about 2 minutes.
Step 3: Add the Kimchi and Sauces
Now, it’s time to bring in the star of the show: the kimchi. Add the kimchi (and its juice) to the pan, stirring well to combine with the onions and garlic. Cook for 2–3 minutes, allowing the kimchi to soften and release its flavors. The mixture should start to look glossy and slightly caramelized.
Next, stir in the gochujang, soy sauce, and sesame oil. Mix well to coat everything evenly. Taste and adjust the seasoning—add more gochujang for heat, more soy sauce for saltiness, or a splash of kimchi juice for tang.
Step 4: Add the Rice and Crisp It Up
Here’s where the magic happens. Add the cooked rice to the pan, breaking up any clumps with your hands or a spatula. Stir well to combine the rice with the kimchi mixture. Press the rice down into the pan with the spatula, letting it cook undisturbed for 1–2 minutes to form a crispy bottom. This is the secret to that addictive, golden crust!
Once the bottom is golden, toss the rice gently to mix in the crispy bits. Continue cooking for another 3–4 minutes, stirring occasionally, until the rice is heated through and well-coated in the sauces.
If the rice starts to stick, don’t panic! Just add a splash of water or more oil to loosen it. The goal is to achieve a balance of crispy and tender rice.
Step 5: Cook the Eggs (Optional but Recommended)
While the rice is cooking, heat a small non-stick pan over medium heat. Add a teaspoon of oil and swirl to coat. Pour in the beaten eggs and let them spread out into a thin layer. Cook until the edges are set but the center is still slightly runny, about 1–2 minutes. Fold the omelet in half and slide it onto a plate. Repeat if making multiple eggs.
Alternatively, you can fry the eggs sunny-side up for a runny yolk that will add richness to each bite.
Step 6: Assemble and Garnish
Transfer the kimchi fried rice to serving bowls. Top with the cooked protein (if using), the fried eggs, sliced green onions, and a sprinkle of toasted sesame seeds. For extra flair, drizzle with a little extra sesame oil or a dash of chili flakes.
Serve immediately while everything is hot and fragrant. The contrast of the crispy rice, tender eggs, and tangy kimchi is pure bliss.
Customization Ideas: Make It Your Own
One of the best things about homemade kimchi fried rice is how adaptable it is. Here are some ways to put your own spin on it:
Protein Swaps
- Pork belly: Thinly slice and pan-fry until crispy for a luxurious texture.
- Spam: A classic choice in Hawaiian-style kimchi fried rice. Pan-fry slices until caramelized.
- Tofu: Press, cube, and pan-fry until golden for a vegetarian option.
- Chicken: Use shredded rotisserie chicken or diced breast for a lighter twist.
- Shrimp: Quick-cooking and sweet, shrimp pairs beautifully with the kimchi.
Veggie Add-Ins
- Carrots: Julienne for a sweet crunch.
- Zucchini: Dice and sauté until tender.
- Mushrooms: Shiitake or oyster mushrooms add an earthy depth.
- Bean sprouts: For a fresh, crunchy texture.
- Bell peppers: Slice thinly for a pop of color and sweetness.
Sauce Variations
- Less spicy: Reduce the gochujang to 1 tablespoon and add a teaspoon of honey or sugar to balance the heat.
- Extra umami: Stir in a teaspoon of fish sauce or oyster sauce with the soy sauce.
- Creamy twist: Add a dollop of mayo or a splash of cream cheese for a richer texture.
Garnish Ideas
- Nori (seaweed): Cut into strips and sprinkle on top for a seafood-like flavor.
- Pickled radish: Adds a sweet and tangy crunch.
- Crushed peanuts: For a nutty texture contrast.
- Fried shallots: Store-bought or homemade for extra crispiness.
Pro Tips for the Best Kimchi Fried Rice
Now that you’ve got the basics down, here are some expert tips to take your kimchi fried rice to the next level:
- Use cold rice: Freshly cooked rice is too moist and will turn mushy. Spread leftover rice on a tray and refrigerate for 30 minutes to dry it out.
- High heat is key: A screaming-hot pan is what gives you those coveted crispy edges. Don’t be afraid to turn up the heat!
- Don’t overcrowd the pan: Cook in batches if needed to avoid steaming the rice instead of frying it.
- Taste as you go: Adjust the seasoning with salt, pepper, or a splash of soy sauce at the end if needed.
- Let it rest: If you have time, let the fried rice sit for 5 minutes off the heat before serving. This allows the flavors to meld together.
- Experiment with kimchi: Try different brands or styles of kimchi—milder or spicier, with or without veggies—to find your favorite flavor profile.
Frequently Asked Questions
Can I make kimchi fried rice without eggs?
Absolutely! The eggs are optional, though they add a lovely richness. You can omit them entirely or replace them with avocado slices for a creamy texture.
What’s the best rice to use?
Short-grain white rice (like sushi rice) is traditional and gives the best texture. However, jasmine rice or even brown rice will work—just be aware that brown rice may take slightly longer to crisp up.
How do I store leftovers?
Kimchi fried rice keeps well in the fridge for up to 3 days. Store it in an airtight container and reheat in a skillet over medium heat, adding a splash of water or oil to loosen the rice. Avoid the microwave, as it can make the rice soggy.
Can I freeze kimchi fried rice?
Yes, but the texture may change slightly. Freeze in an airtight container for up to 3 months. Thaw overnight in the fridge and reheat in a pan, adding a bit of water to refresh the rice.
What if I don’t have gochujang?
You can substitute it with a mix of sriracha and miso paste (1:1 ratio) or a dash of cayenne pepper and a teaspoon of sugar. The flavor won’t be identical, but it’ll still be delicious.
A Love Letter to Comfort Food
There’s a certain joy in making a dish that feels like it’s been passed down through generations, even if it’s only been a few years in your own kitchen. For me, homemade kimchi fried rice is one of those dishes—a humble yet deeply flavorful meal that’s equal parts nostalgic and exciting.
It’s the kind of recipe that invites you to play, to experiment, and to make it your own. Whether you’re cooking for one or feeding a crowd, this dish is a reminder that the best meals often come from the simplest ingredients, transformed by a little love and a lot of heat.
So next time you’re staring into your fridge, wondering what to make for dinner, remember this recipe. Grab that leftover rice, that jar of kimchi, and a handful of pantry staples. Fire up the stove, crank up the heat, and let the sizzle of the pan guide you to a meal that’s as satisfying to make as it is to eat.
And when you take that first bite—the crispy edges giving way to tender rice, the spicy tang of kimchi dancing on your tongue—you’ll understand why this dish has earned a permanent spot in my heart (and my recipe rotation).
Now, it’s your turn. Grab your wok, your whisk, and your appetite. The best kimchi fried rice of your life is waiting to be made.
Your Turn: Share Your Creation
I’d love to see your homemade kimchi fried rice! Tag me on social media @[YourHandle] or use the hashtag #MyKimchiFriedRice so I can cheer you on. And if you have any tips, tricks, or customizations of your own, drop them in the comments below—I’m always looking for new ways to spice up this classic dish.
Happy cooking!
P.S. If you loved this recipe, be sure to pin it for later or share it with a friend who needs a little comfort in their life. And if you’re craving more Korean-inspired dishes, check out my guide to making the perfect bulgogi at home—it’s next on my list to master!
Related reading
- The Ultimate Crispy Rice Spicy Salmon Bowls
- The 10-Minute Turkish Pasta Recipe Everyone is Obsessing Over
- Sticky Vegan Orange Tofu